
Table of Contents:
- Background
- What is Chaos Engineering
- Why do we need Chaos Engineering
- Experimenting with Chaos Engineering
- Prerequisite
- Install Litmus Chaos
- Checkout and deploy sample microservices
- Run a network loss fault experiment
- Conclusion
Background
This tutorial will guide you to Chaos Engineering. From its concept to the reason why it’s important to how to do it from the developer perspective.
What is Chaos Engineering
Chaos Engineering is a method to test a system’s resiliency, the behavior of the system when something goes wrong. The Chaos Engineering process includes defining the system’s steady state, defining faults that could happen, running the experiment, and measuring the system state. If the system enters failed state, we need to fix it and run the experiment again.
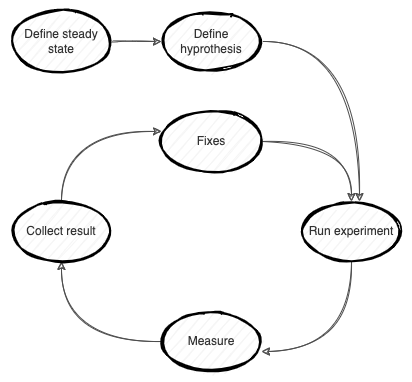 Chaos Engineering Process
Why do we need Chaos Engineering
Software is more and more complex these days. Complex software will eventually need to be broken down into multiple parts. At the same time, running it in the cloud is the way forward. When running a system with multiple moving parts on the cloud which relies on commodity hardware, we can be almost certain that things will fail from time to time. To be confident that our software will always work, we need to fill this new gap in software and system engineering. We need a way to test and measure it. That way is Chaos Engineering.
Experimenting with Chaos Engineering
In this tutorial we will:
- Install Litmus Chaos
- Checkout and deploy sample microservice applications to a Kubernetes cluster.
- Run a network loss fault experiment
- Run a network delay fault experiment
Prerequisite
- A running Kubernetes cluster
- A development machine that can run Java and Maven.
Install Litmus Chaos
Litmus Chaos is a cloud-native software to run Chaos Engineering on the Kubernetes cluster. It comes with custom resources and a web UI that you can use to run an experiment.
You can install Litmus Chaos using Helm or Kubectl by following the steps here.
Checkout and deploy sample microservices
git clone -b start [email protected]:pongsatt/chaos-demo.git
cd chaos-demo
They are simple microservices called provider-app (Go) and consumer-app (Java). As the name suggests consumer-app calls to provider-app using HTTP API.
To simplify the process, I will use Skaffold to build and deploy these applications to Kubernetes. You can use your tool to do it or follow this tutorial if you want to use Skaffold.
For Skaffold users, run these commands to start both applications.
cd provider-app
skaffold dev
cd consumer-app
skaffold dev
A Successful startup should look like this.
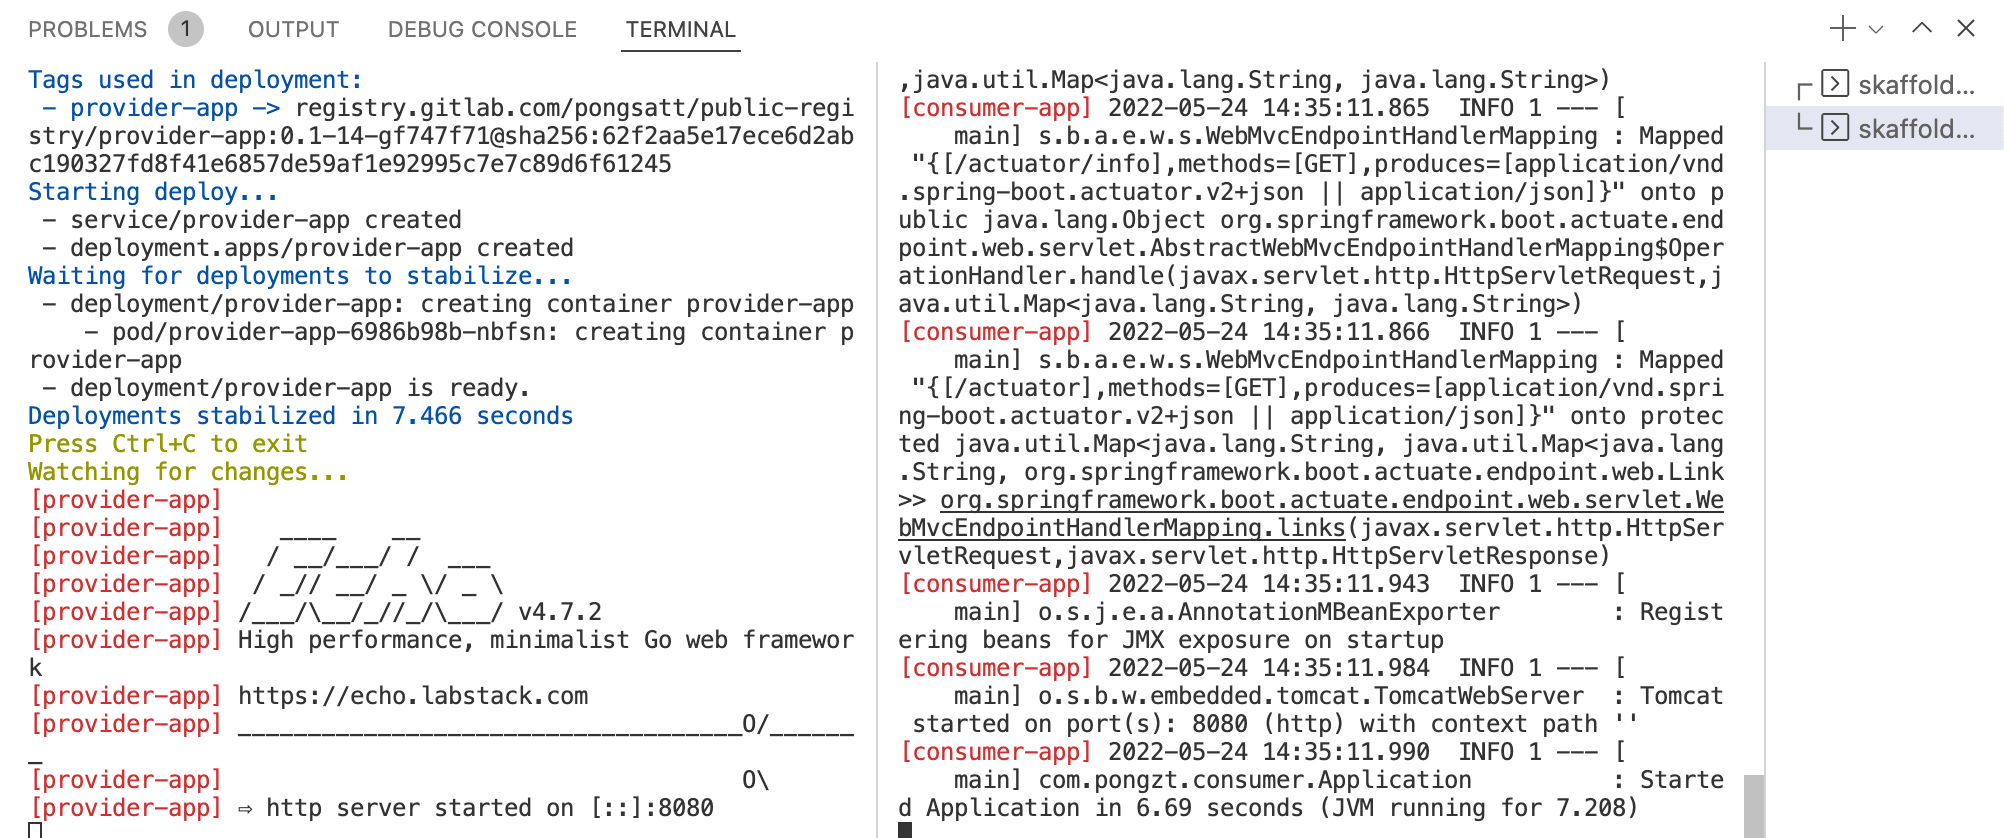 Both applications started successfully
Open consumer-app using port-forwarding.
kubectl port-forward svc/consumer-app 8080:8080
You can also access the application using NodePort.
Open URL http://localhost:8080.
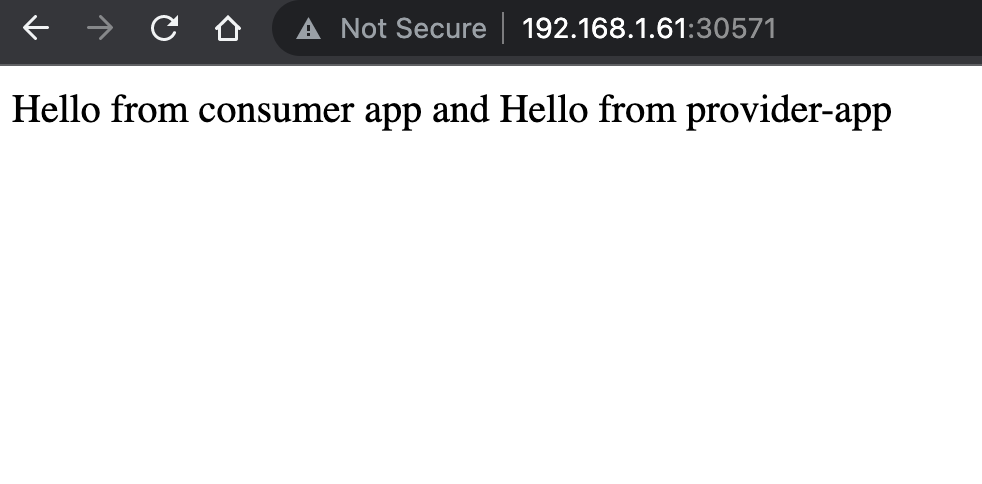 API Response from consumer-app and provider-app
You can see that the response is from both the consumer-app and provider-app because the consumer-app also calls to provider-app and combines it into a single response.
We are ready to run the Chaos experiment.
Run a network loss fault experiment
In this experiment, we will inject network loss to the provider-app and keep checking if the consumer-app’s API is still working as expected.
Create a new Workflow
Log in as an admin, and click the “Schedule a workflow” button.
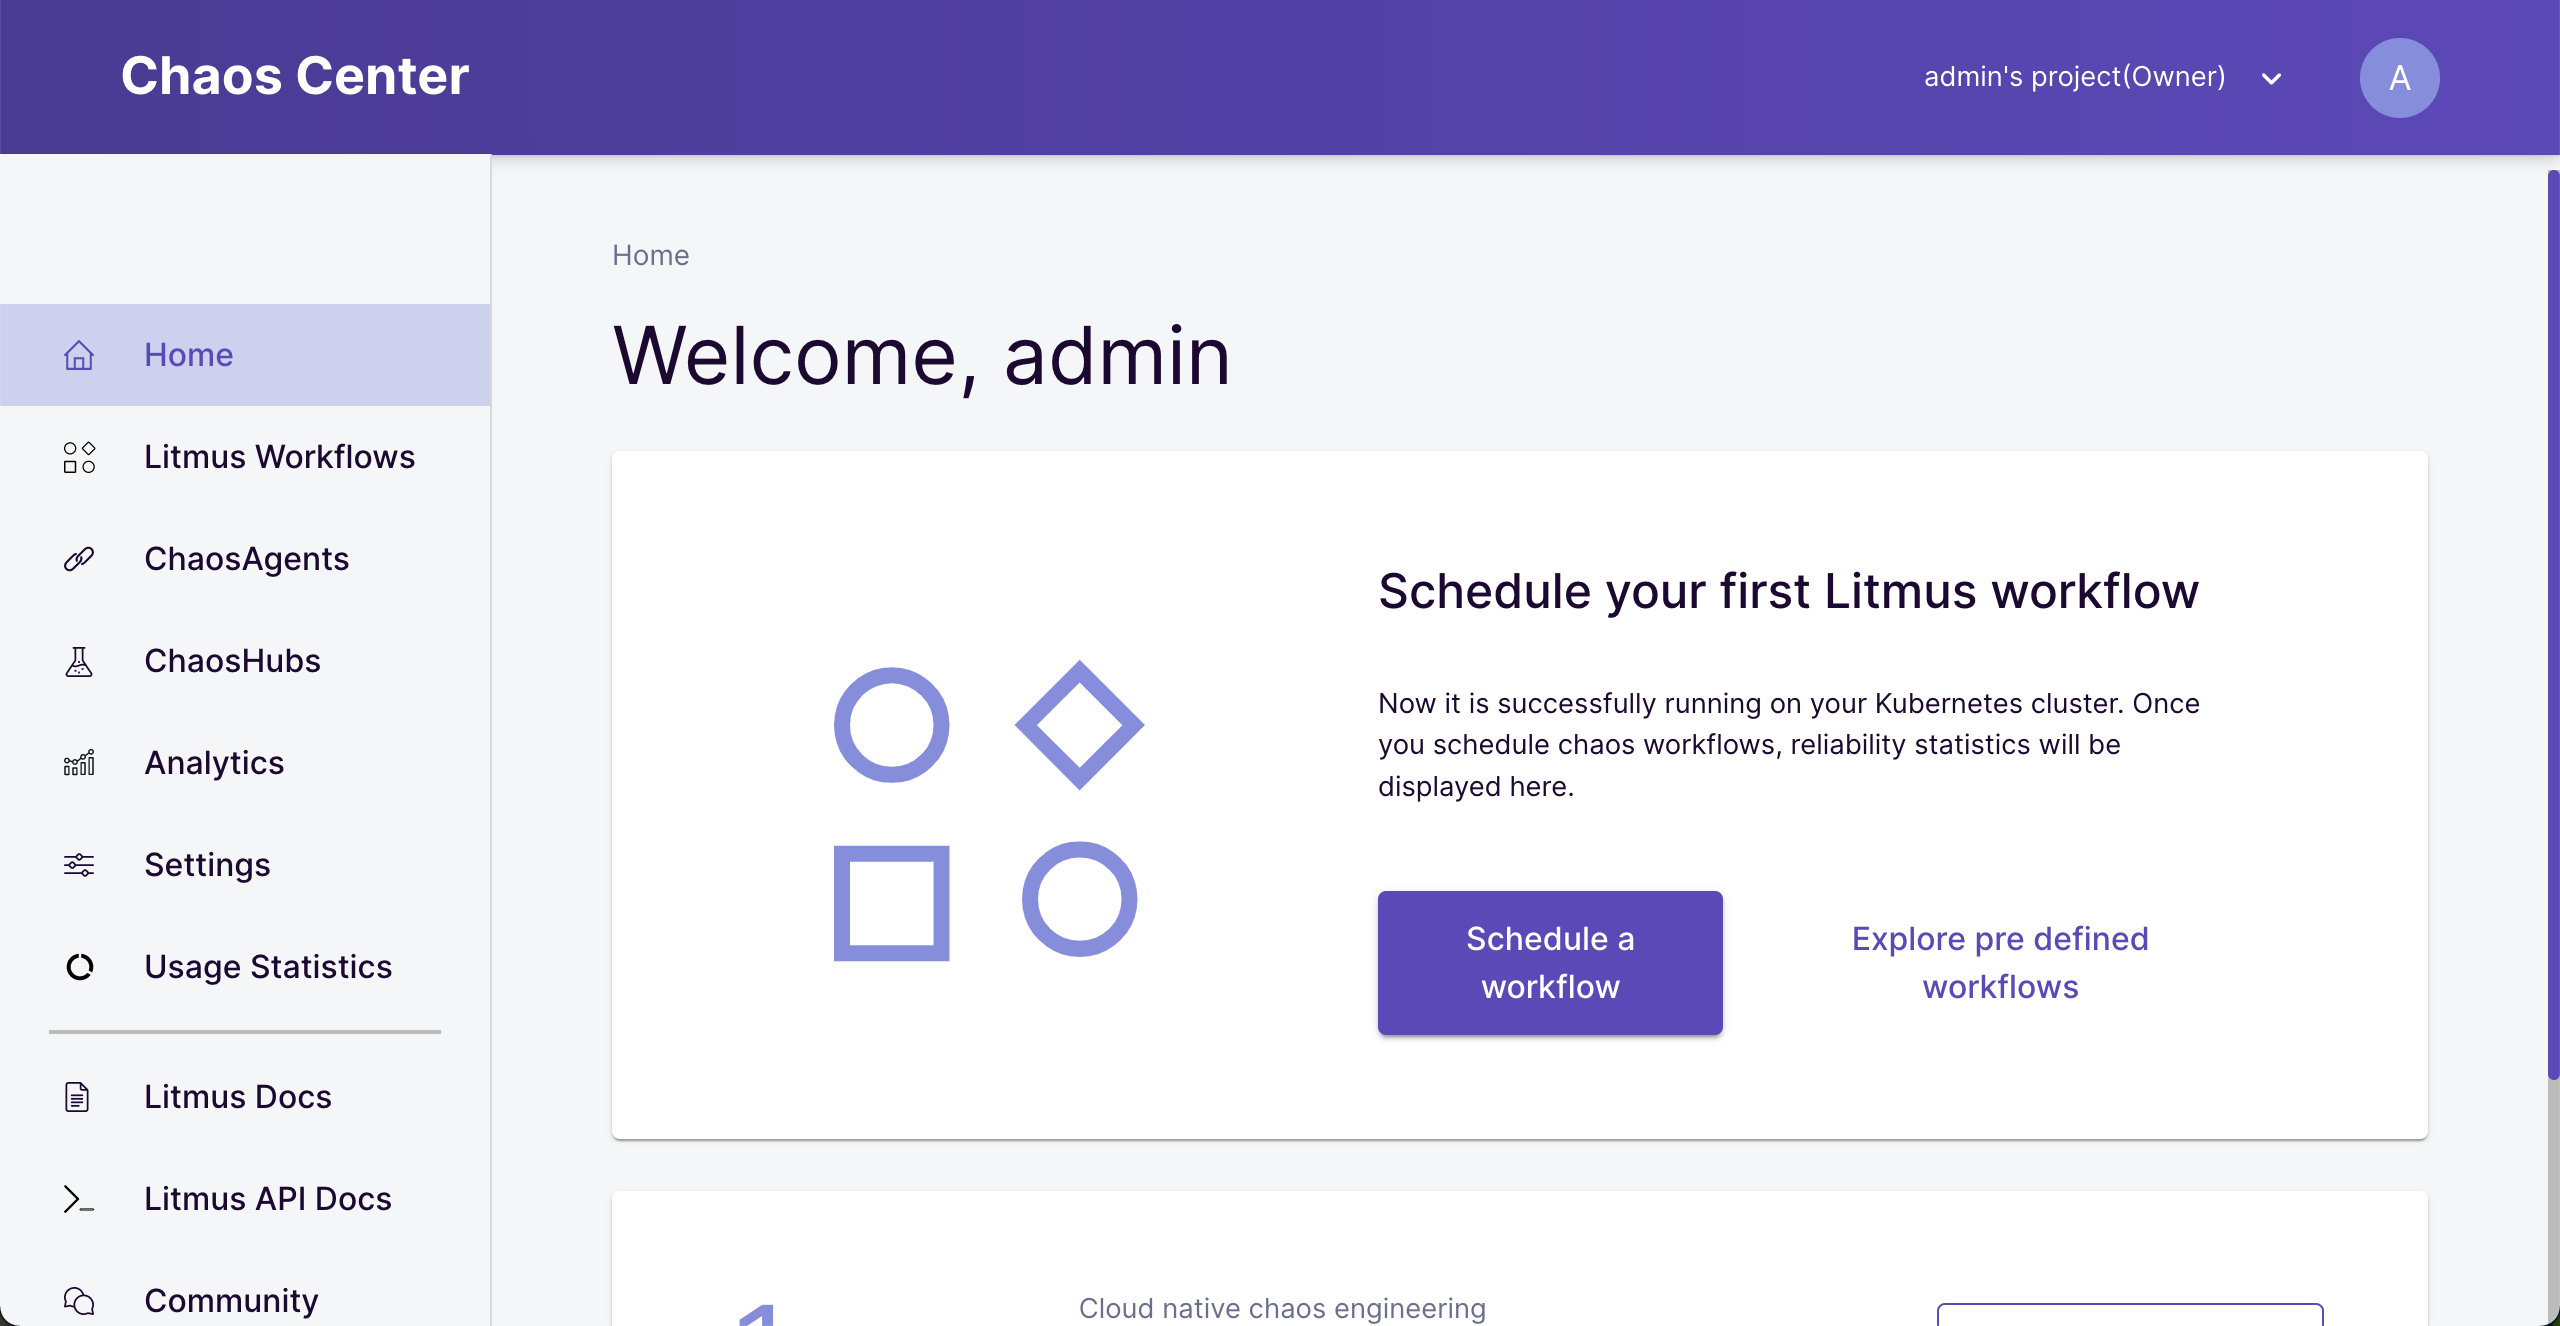 Chaos Center home page
On the “create new workflow” screen, choose “Self-Agent” as a running agent.
This agent was created automatically after installation. If you cannot see it, wait for few minutes or check if the installation is complete.
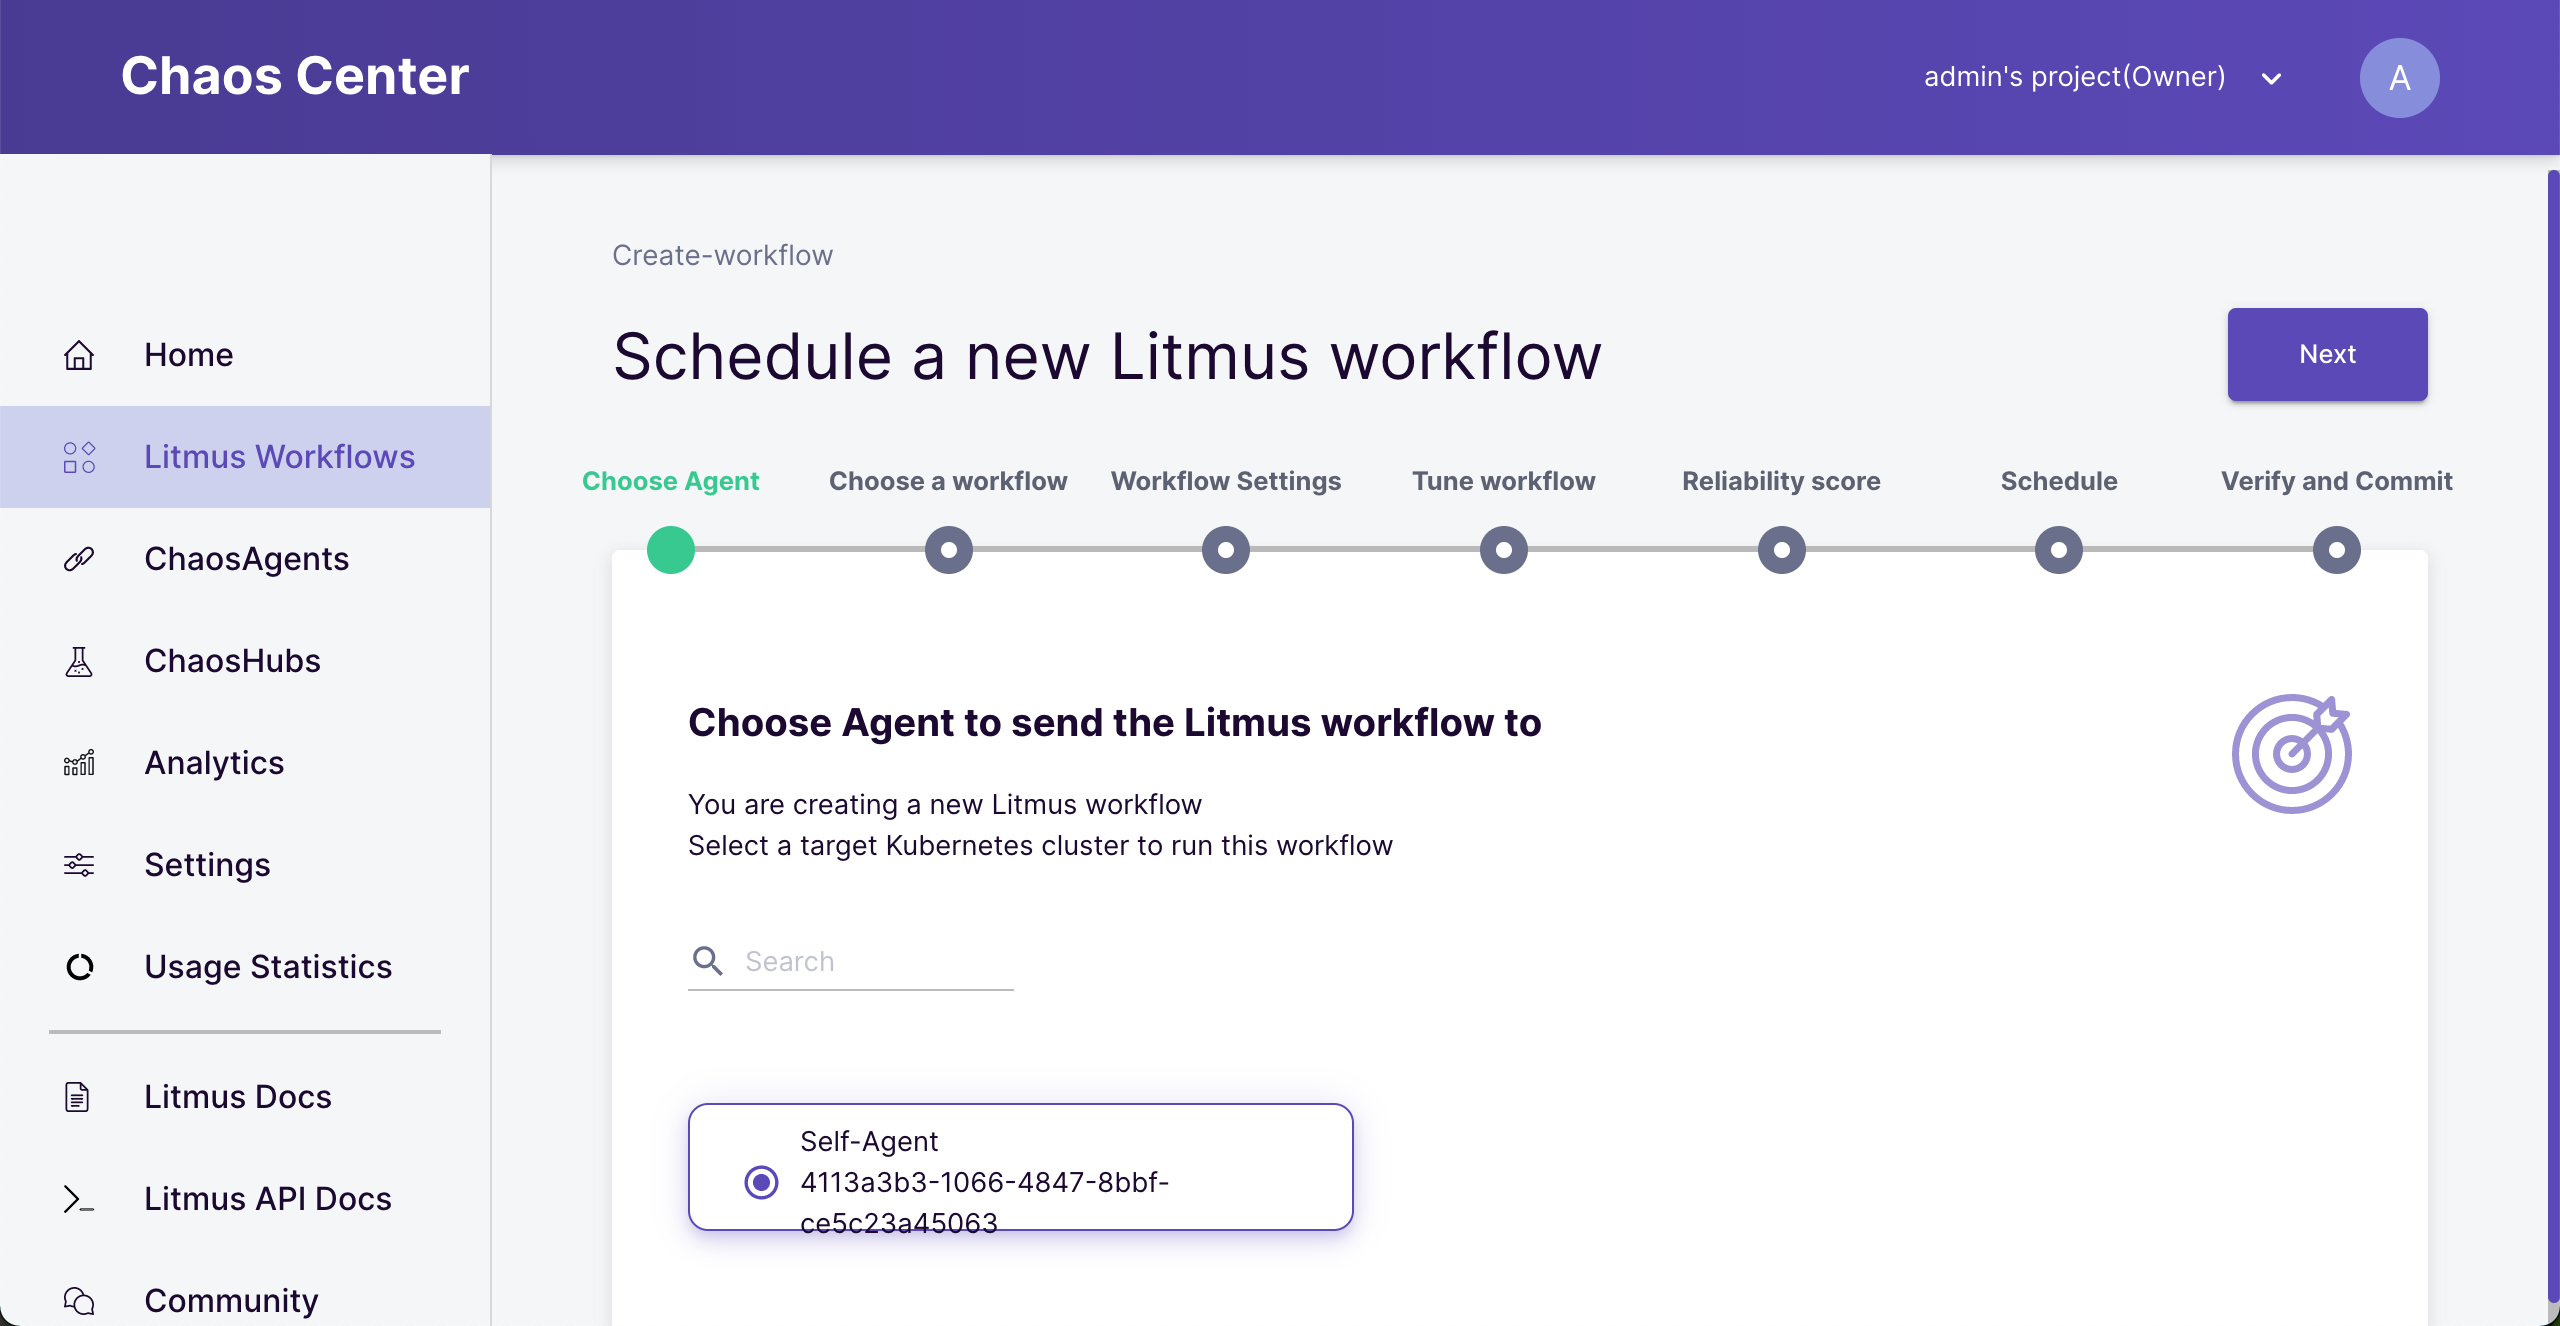 Choose Agent
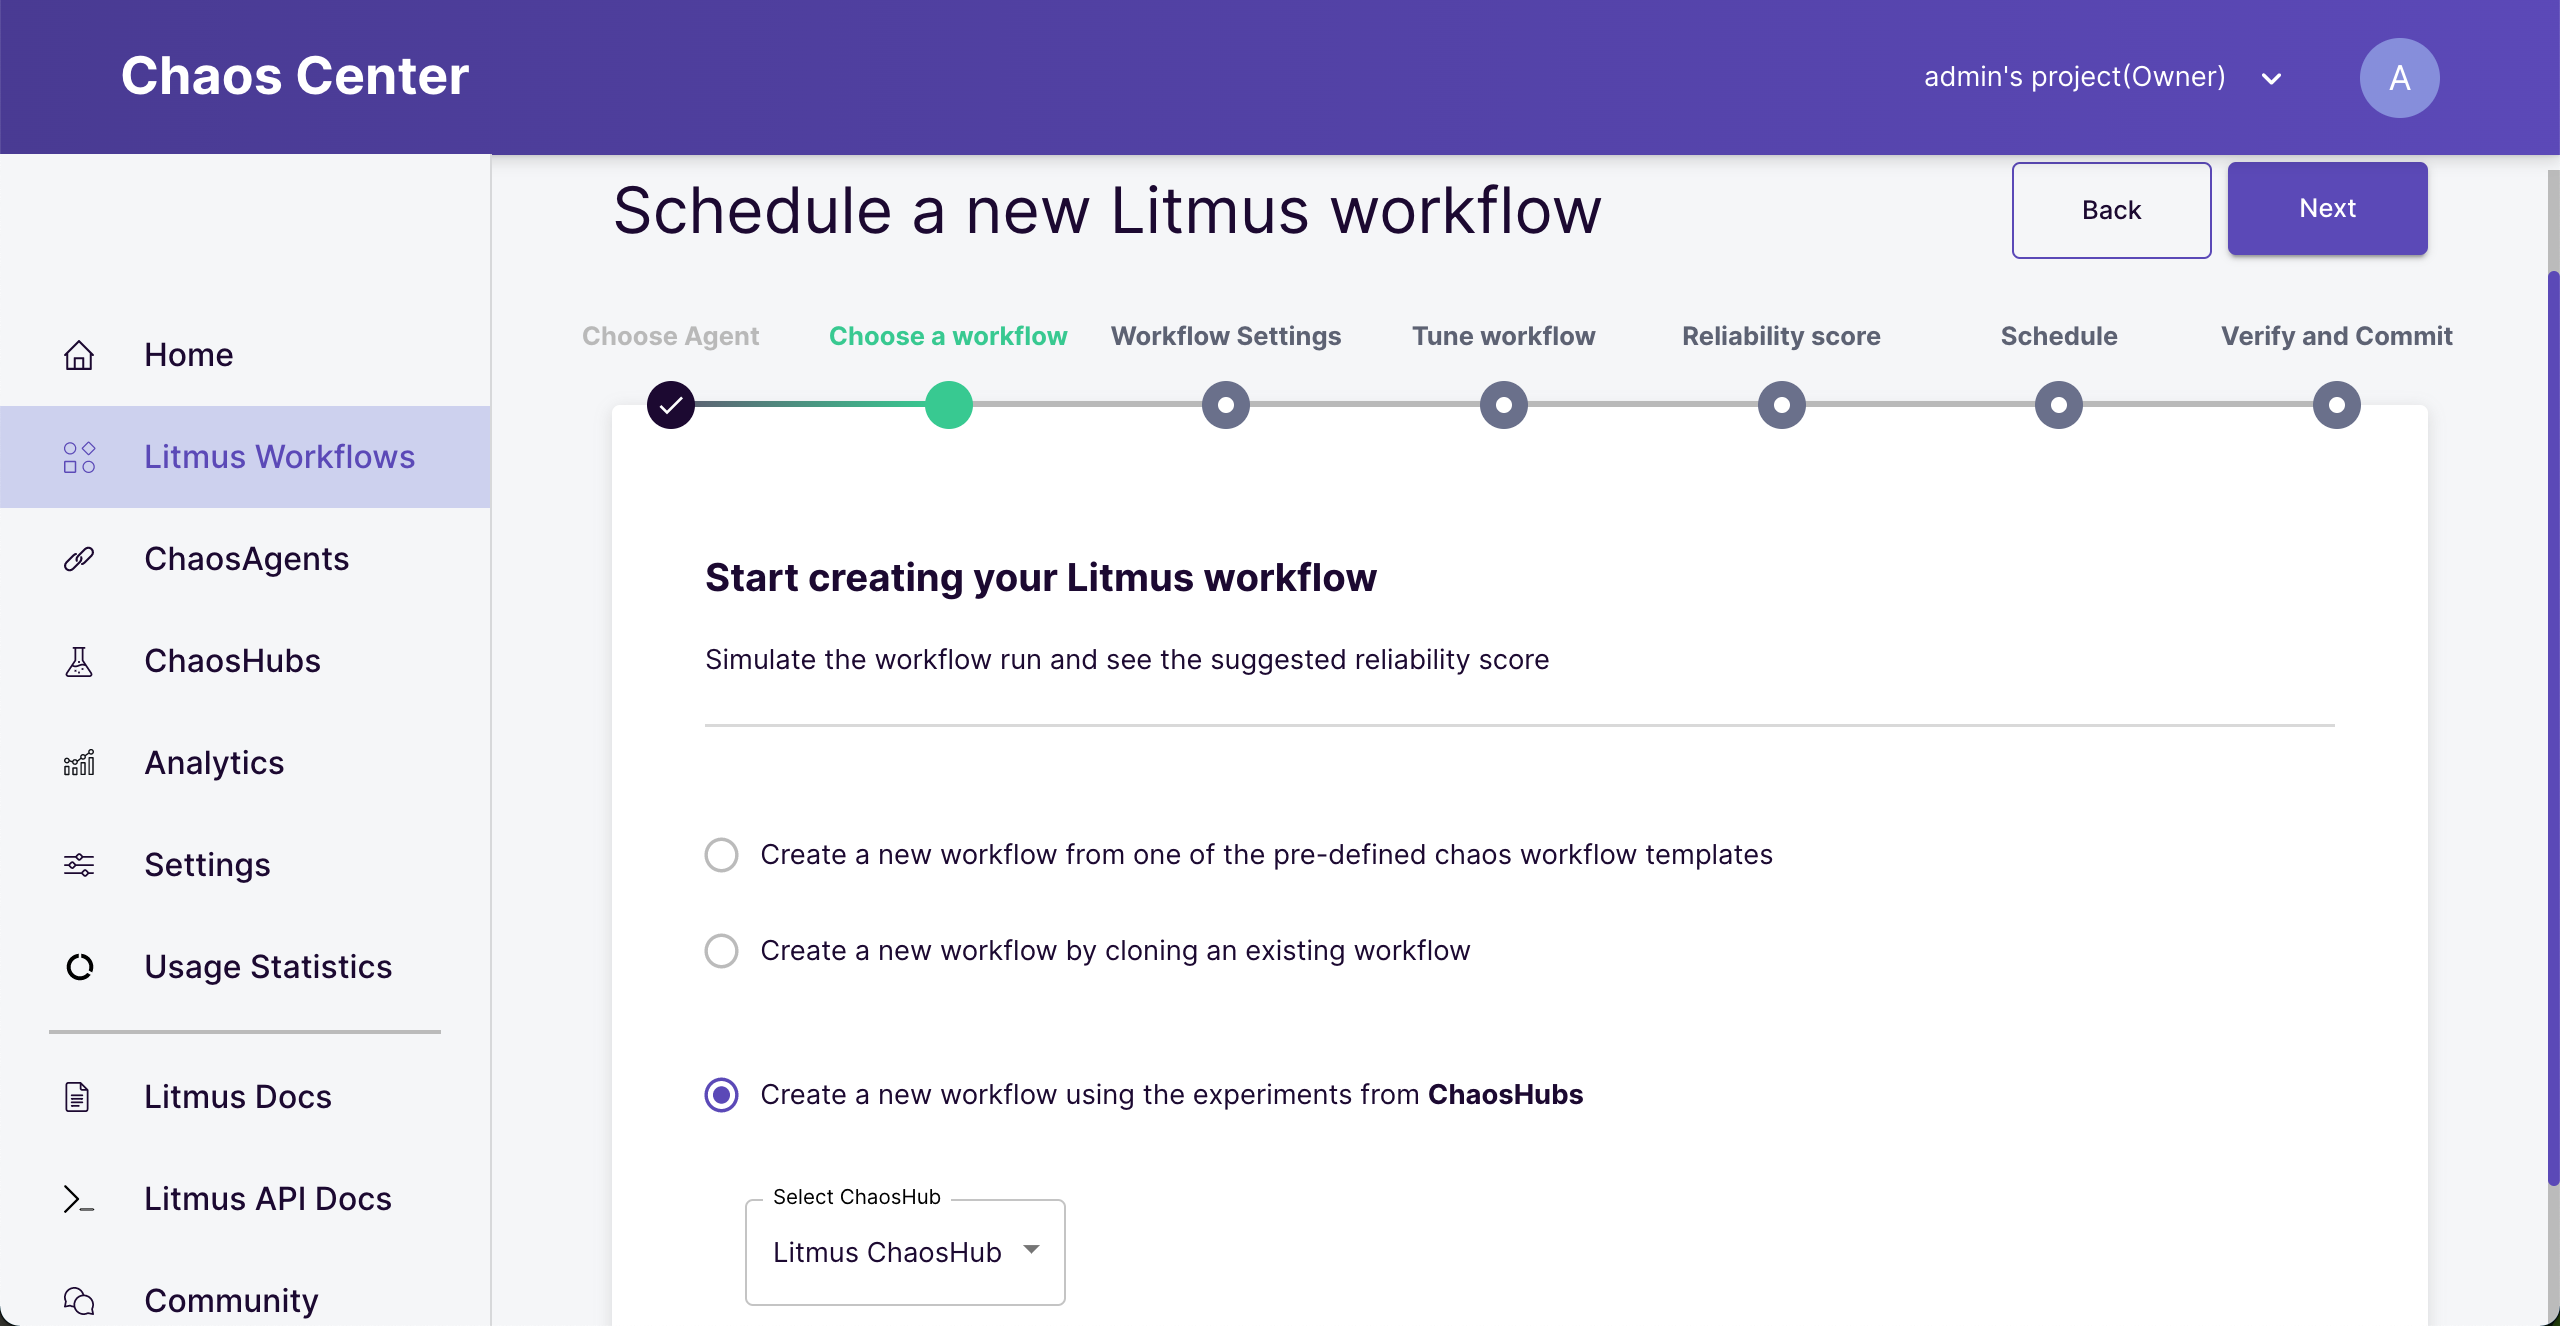
Choose “create a new workflow experiment” from “ChaosHubs”.
This option is for creating a workflow from scratch. You can also save already run workflow as a template and choose cloning from existing workflow option.
 Choose where to get the experiment template
Naming your workflow and click the “Next” button.
Add an Experiment
At this step, we need to add experiments and the sequence to run it. We will add only one experiment to inject network loss into the provider-app application.
Click the “Add a new experiment” button.
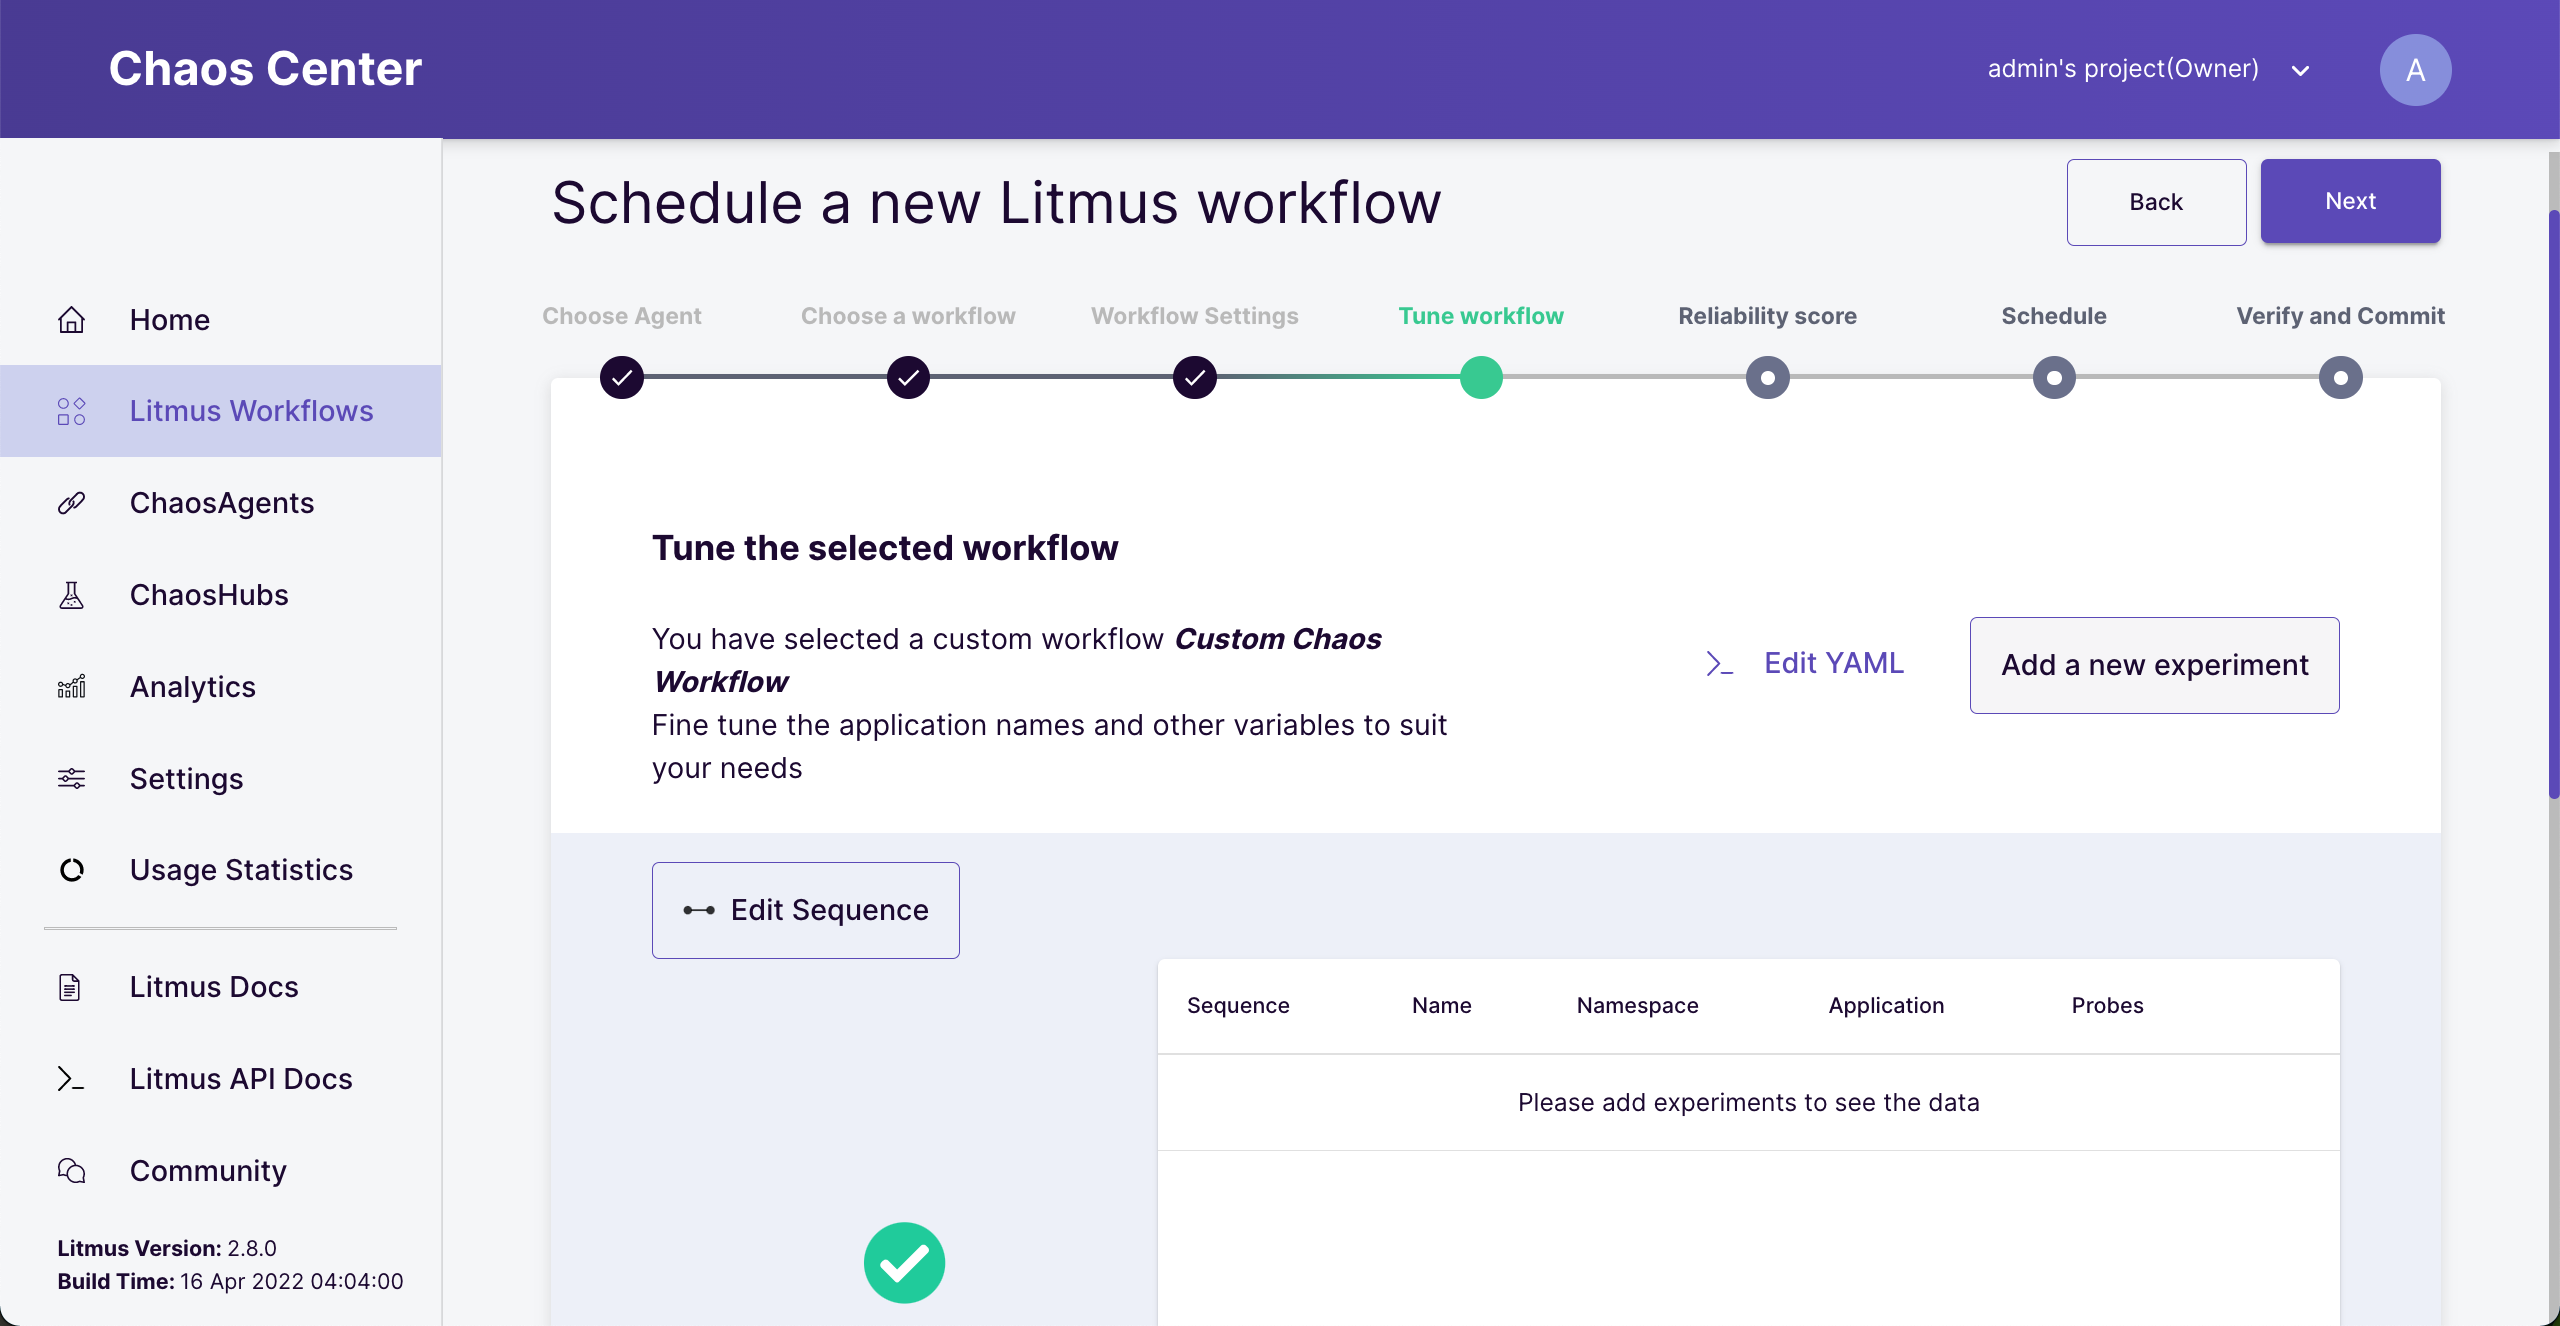 Add an experiment
Choose “generic/pod-network-loss”.
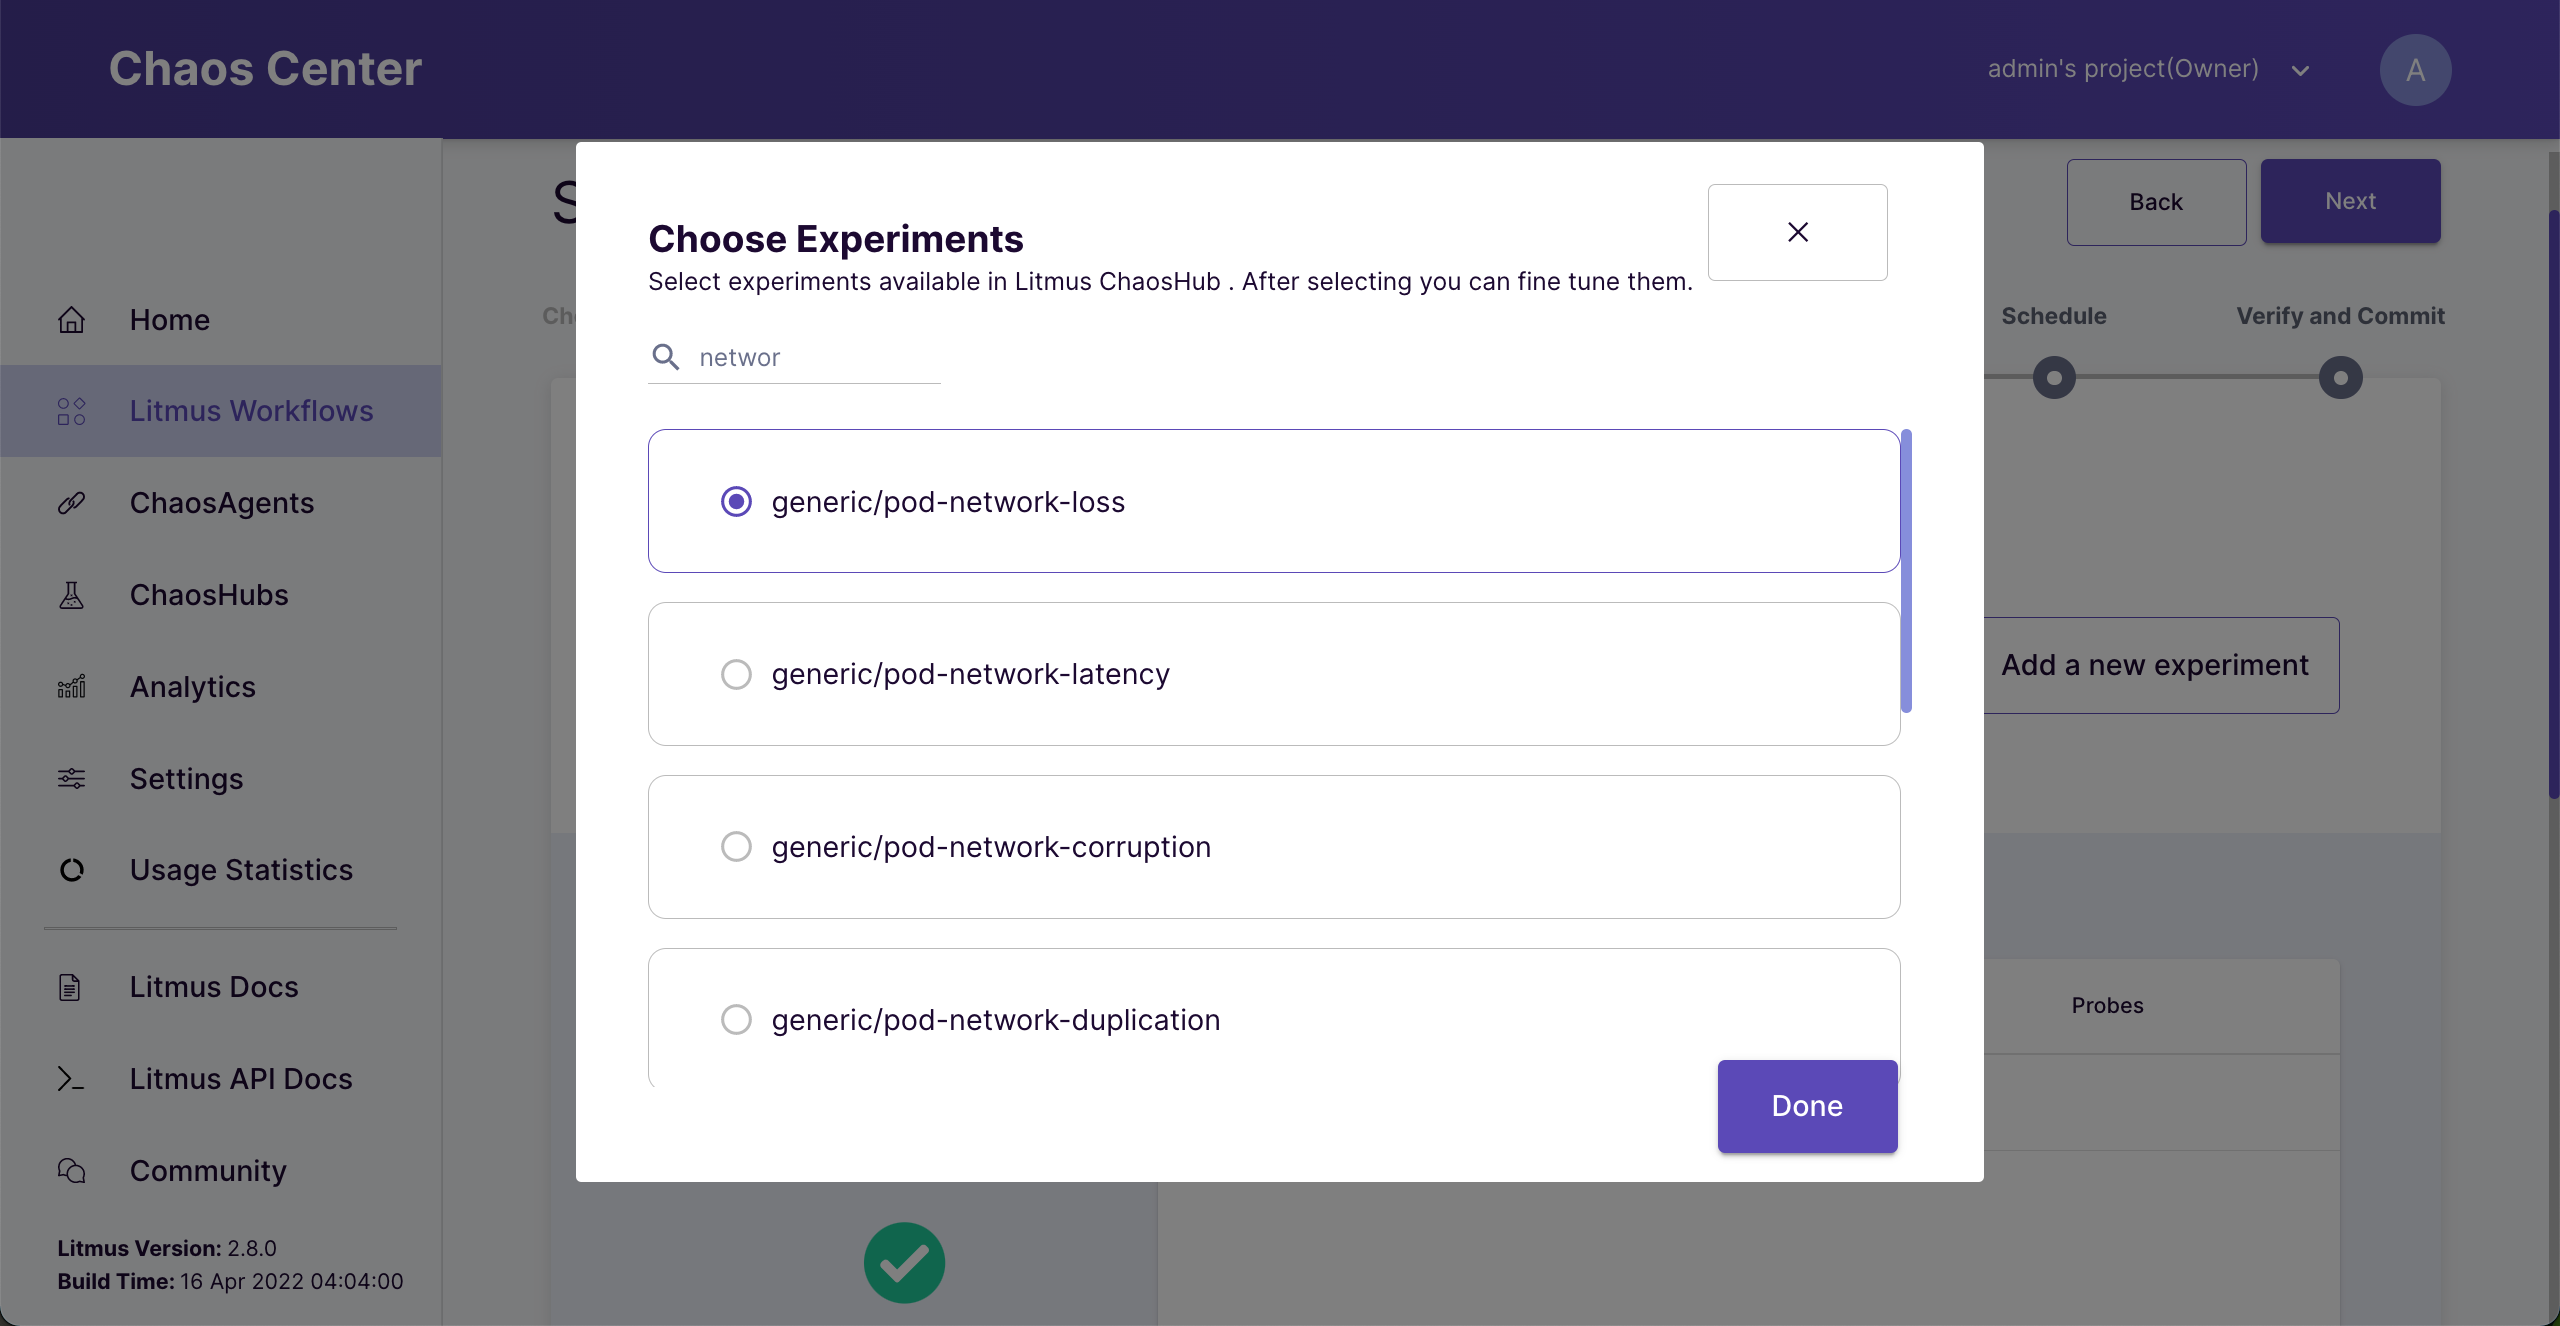 Choose Pod network loss experiment
Click the edit button (pencil icon) to tune our experiment.
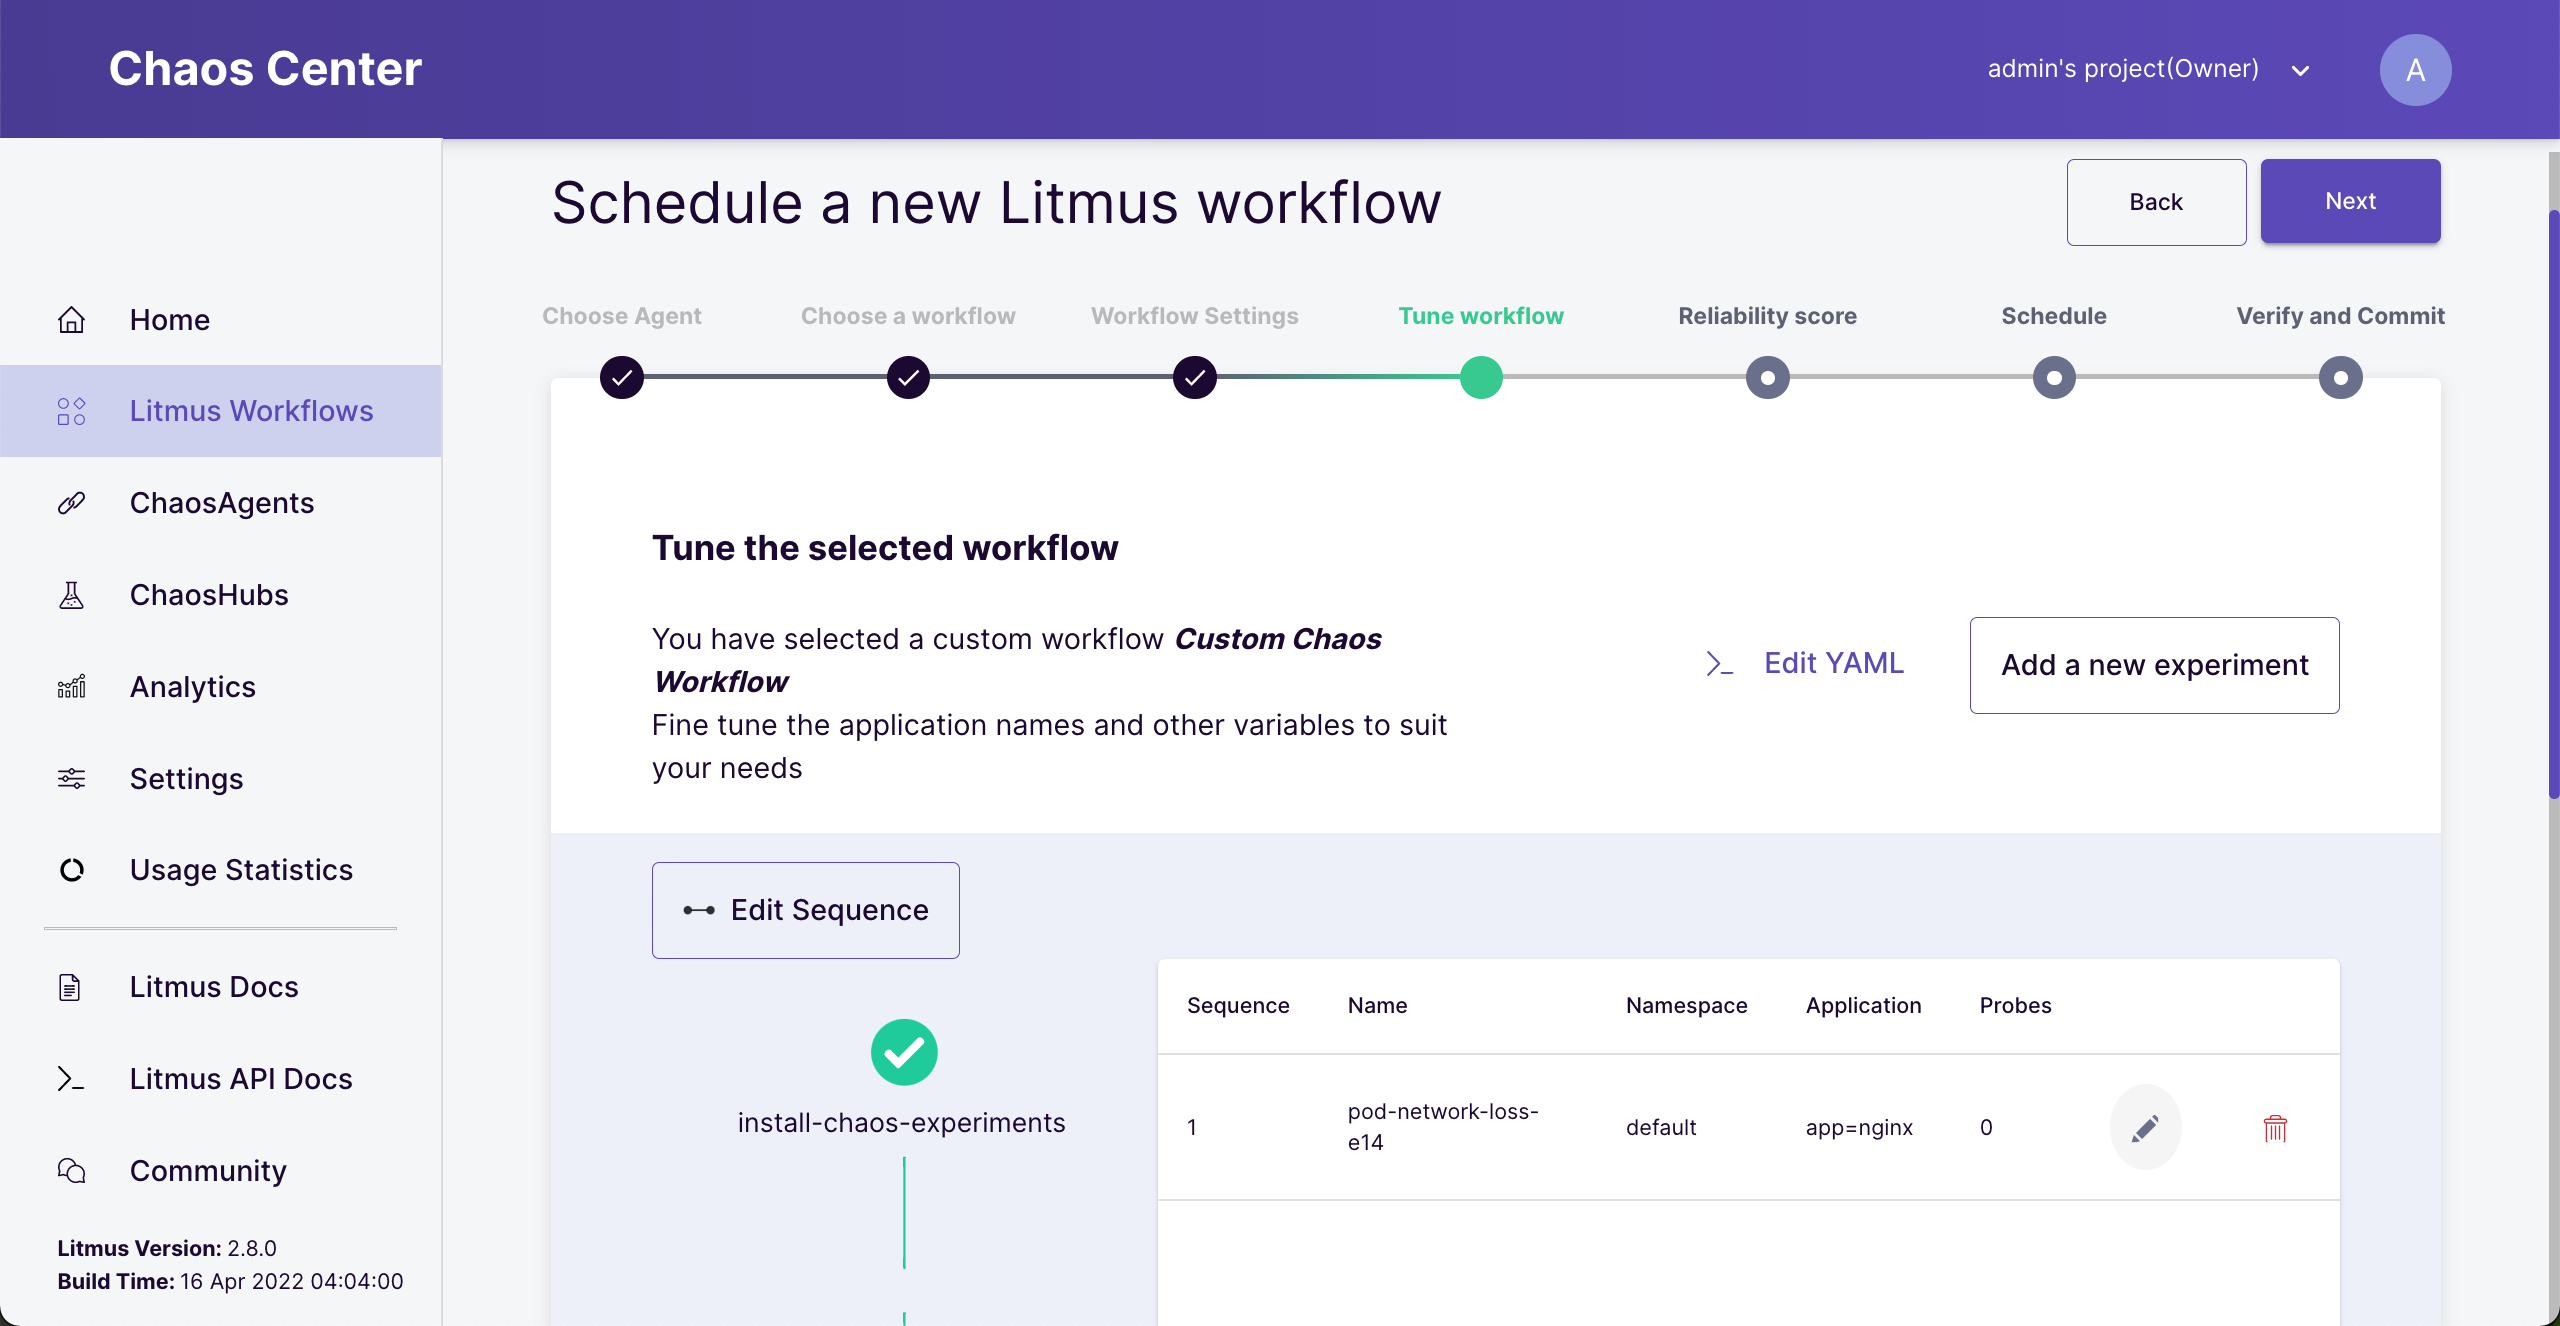 Edit experiment
Set experiment’s target
Click next to change “Target Application”. Then change “appLabel” to “app=provider-app”.
This label is specified in our deployment yaml.
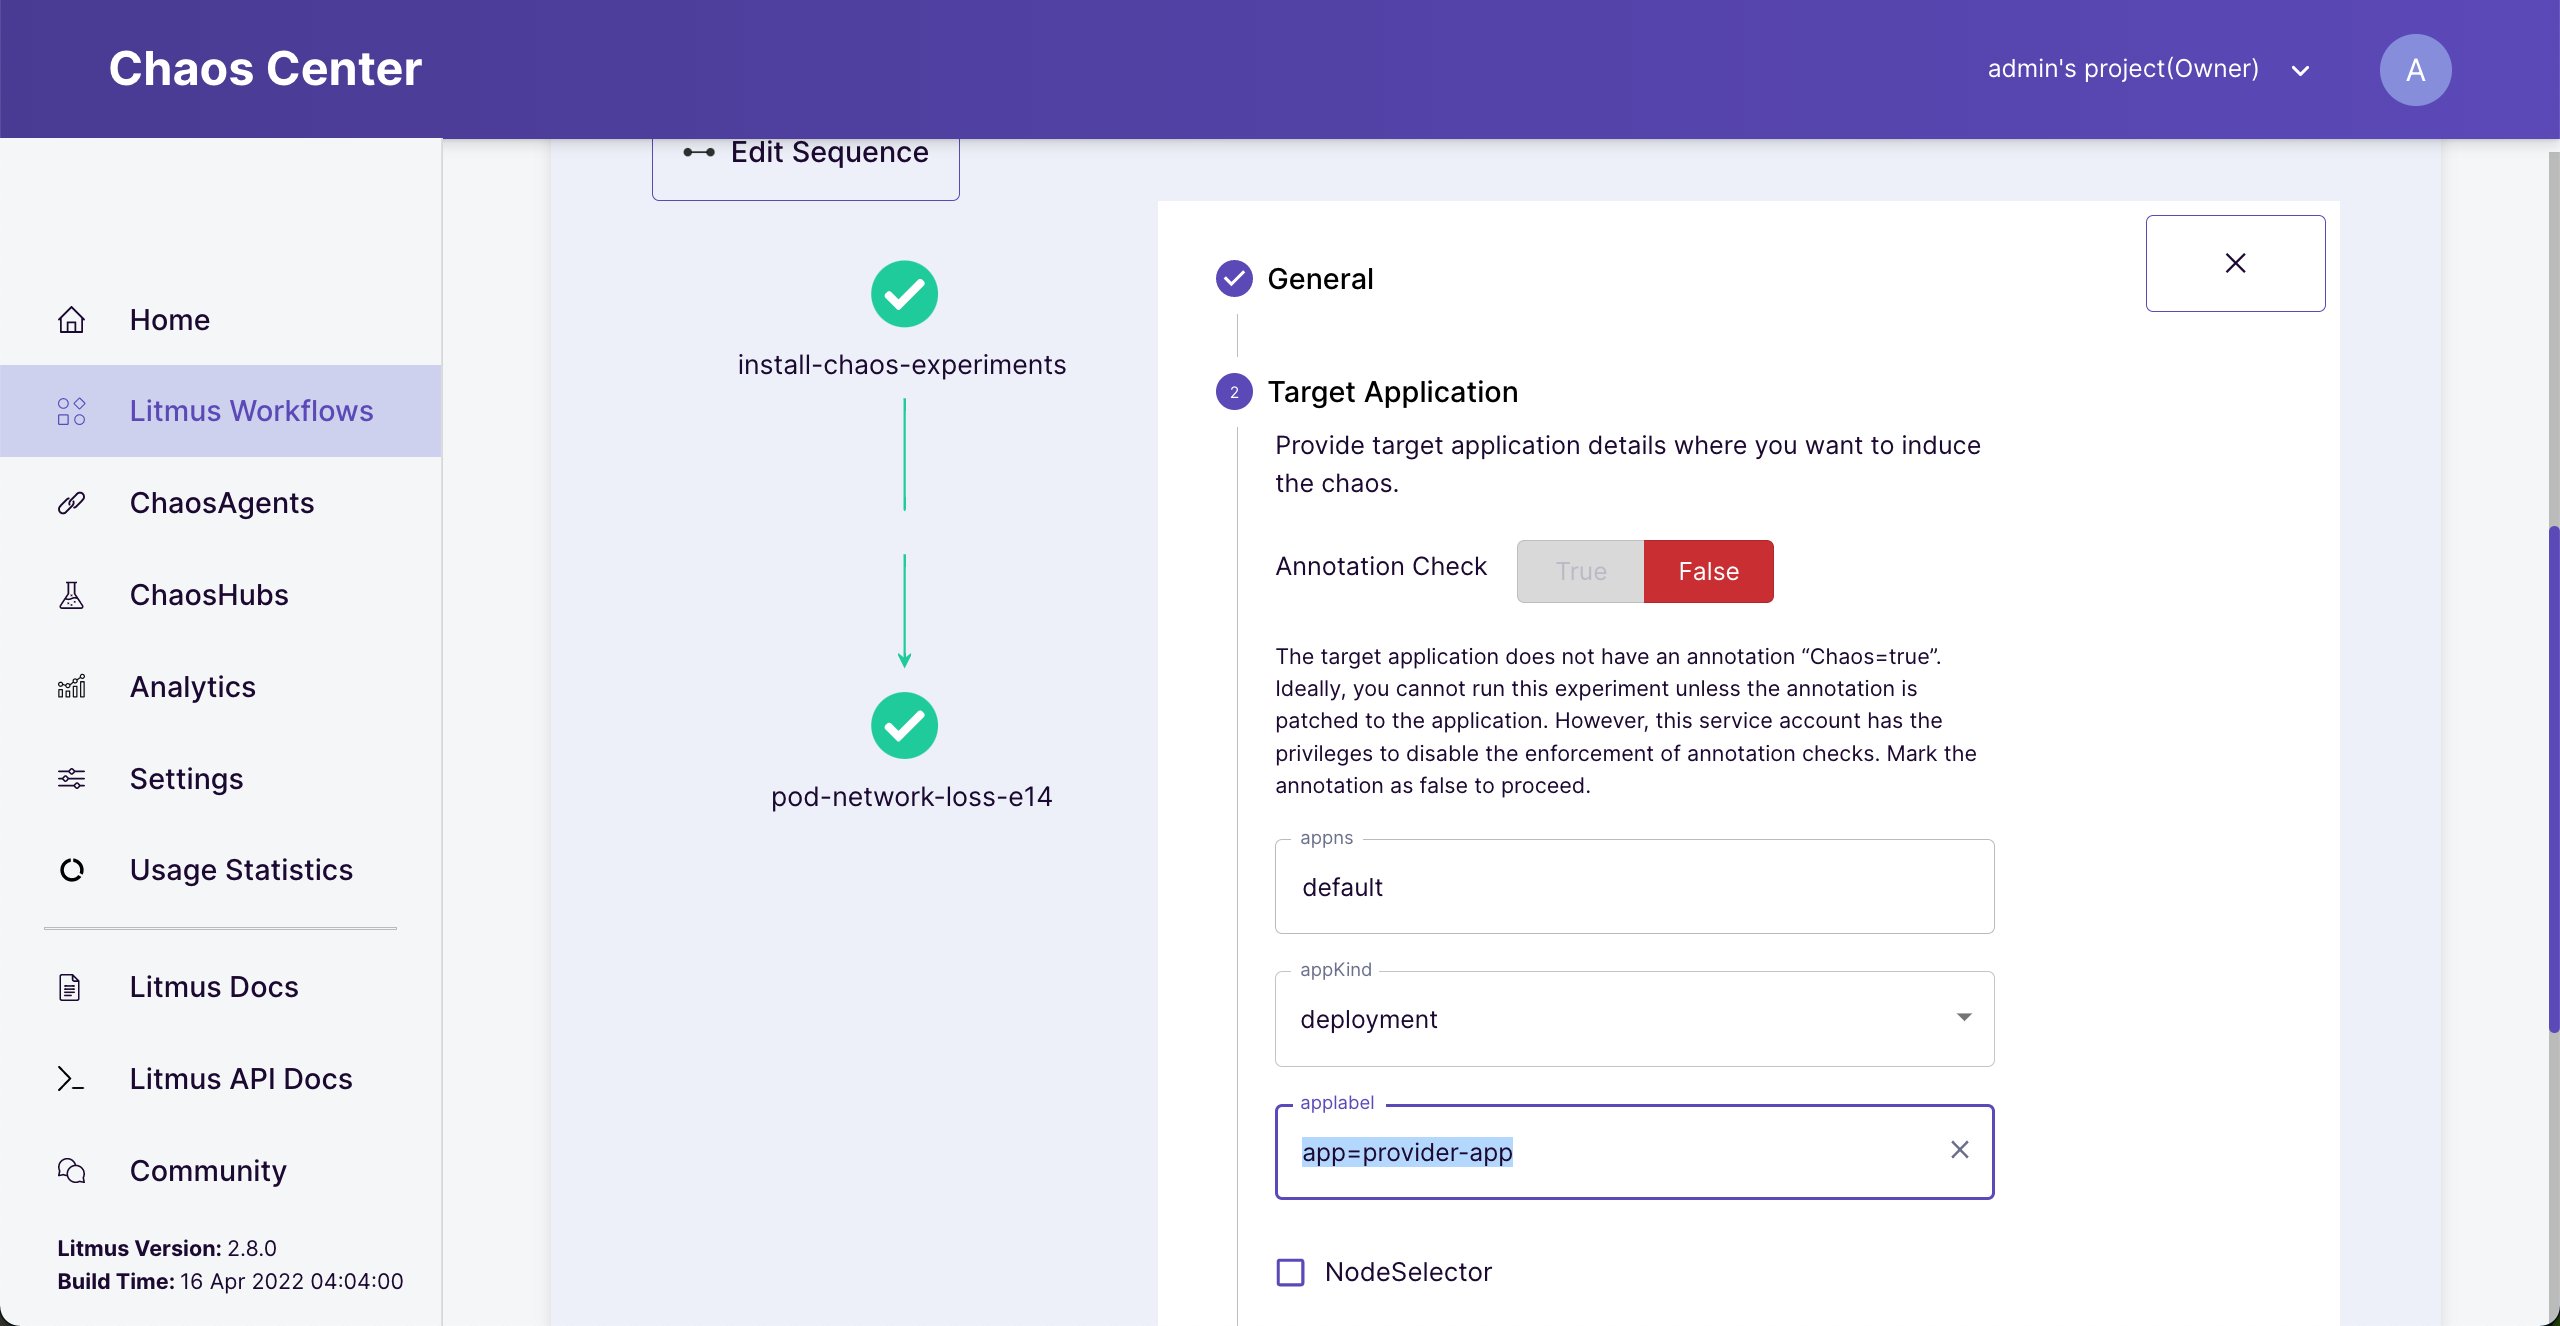 Change target application
Add a Probe
Click “Next” then click “Add a new Probe” to measure the state of our consumer-app application. Fill in the information below then click “Add Probe”.
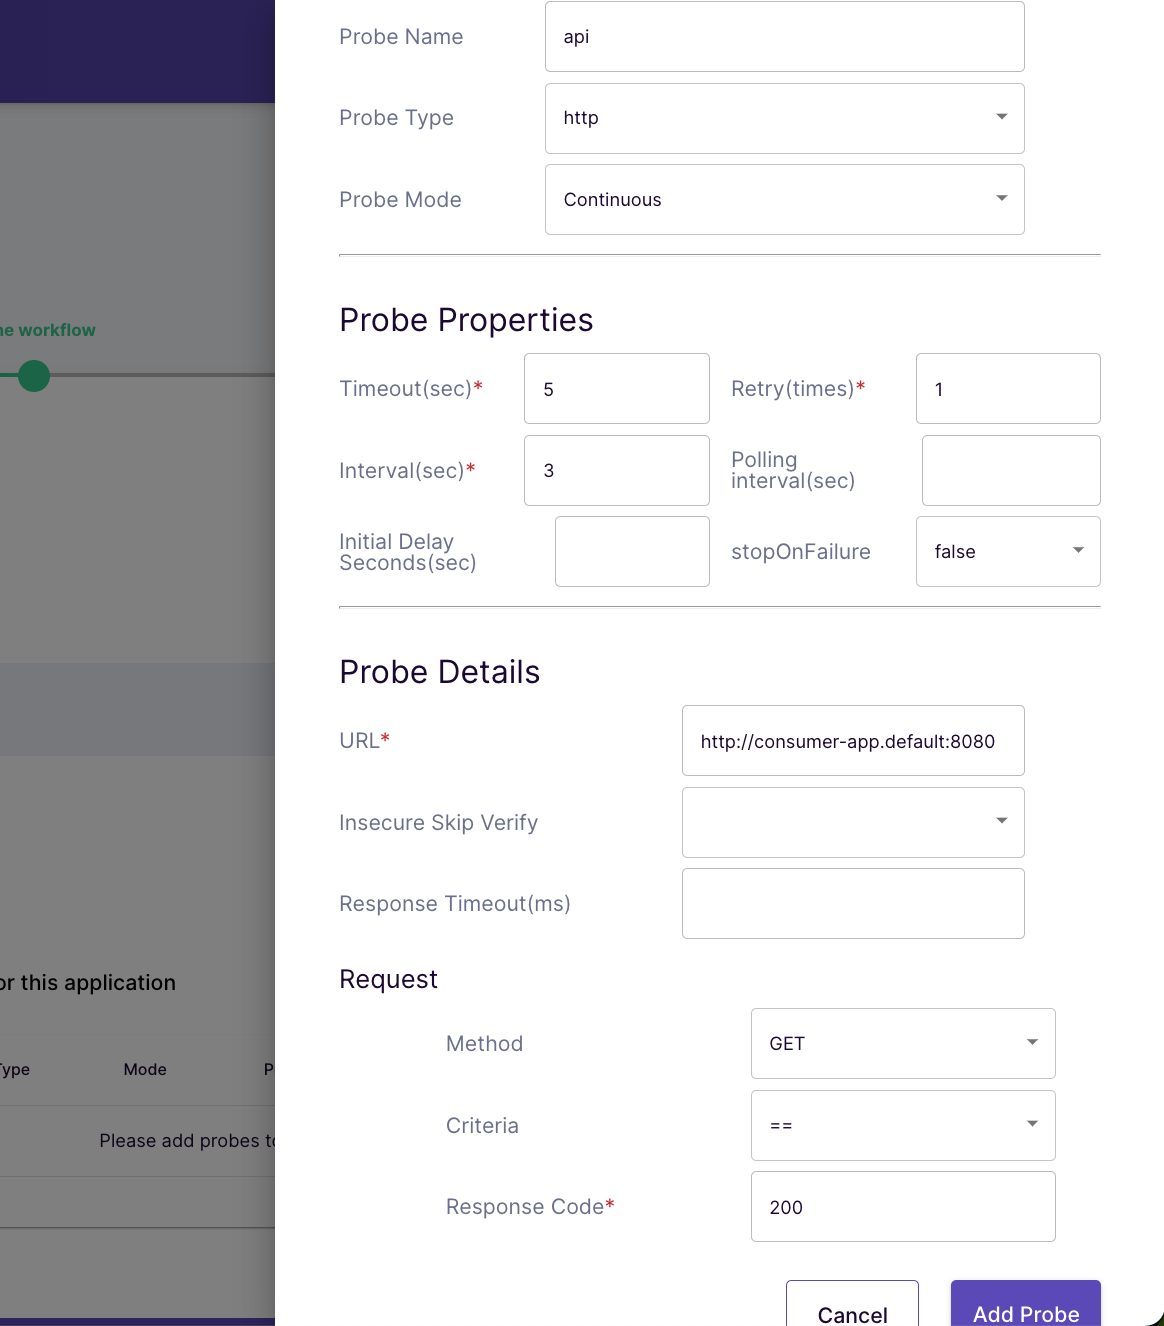 Probe information
This probe will call to our consumer-app API from inside the Kubernetes cluster “http://consumer-app.default:8080” (default is our namespace).
Probe Mode = Continuous - Call the API continuously throughout experiment. Meaning our application needs to be stable from the start, between, after the experiment.
Probe Properties - Make request every 3 seconds with 5 seconds timeout (in case of slow response) and if failed, retry once.
Request - Make a Get request and consider to be success only when the response status is 200.
Set additional properties
Click “Next” to tune our experiment.
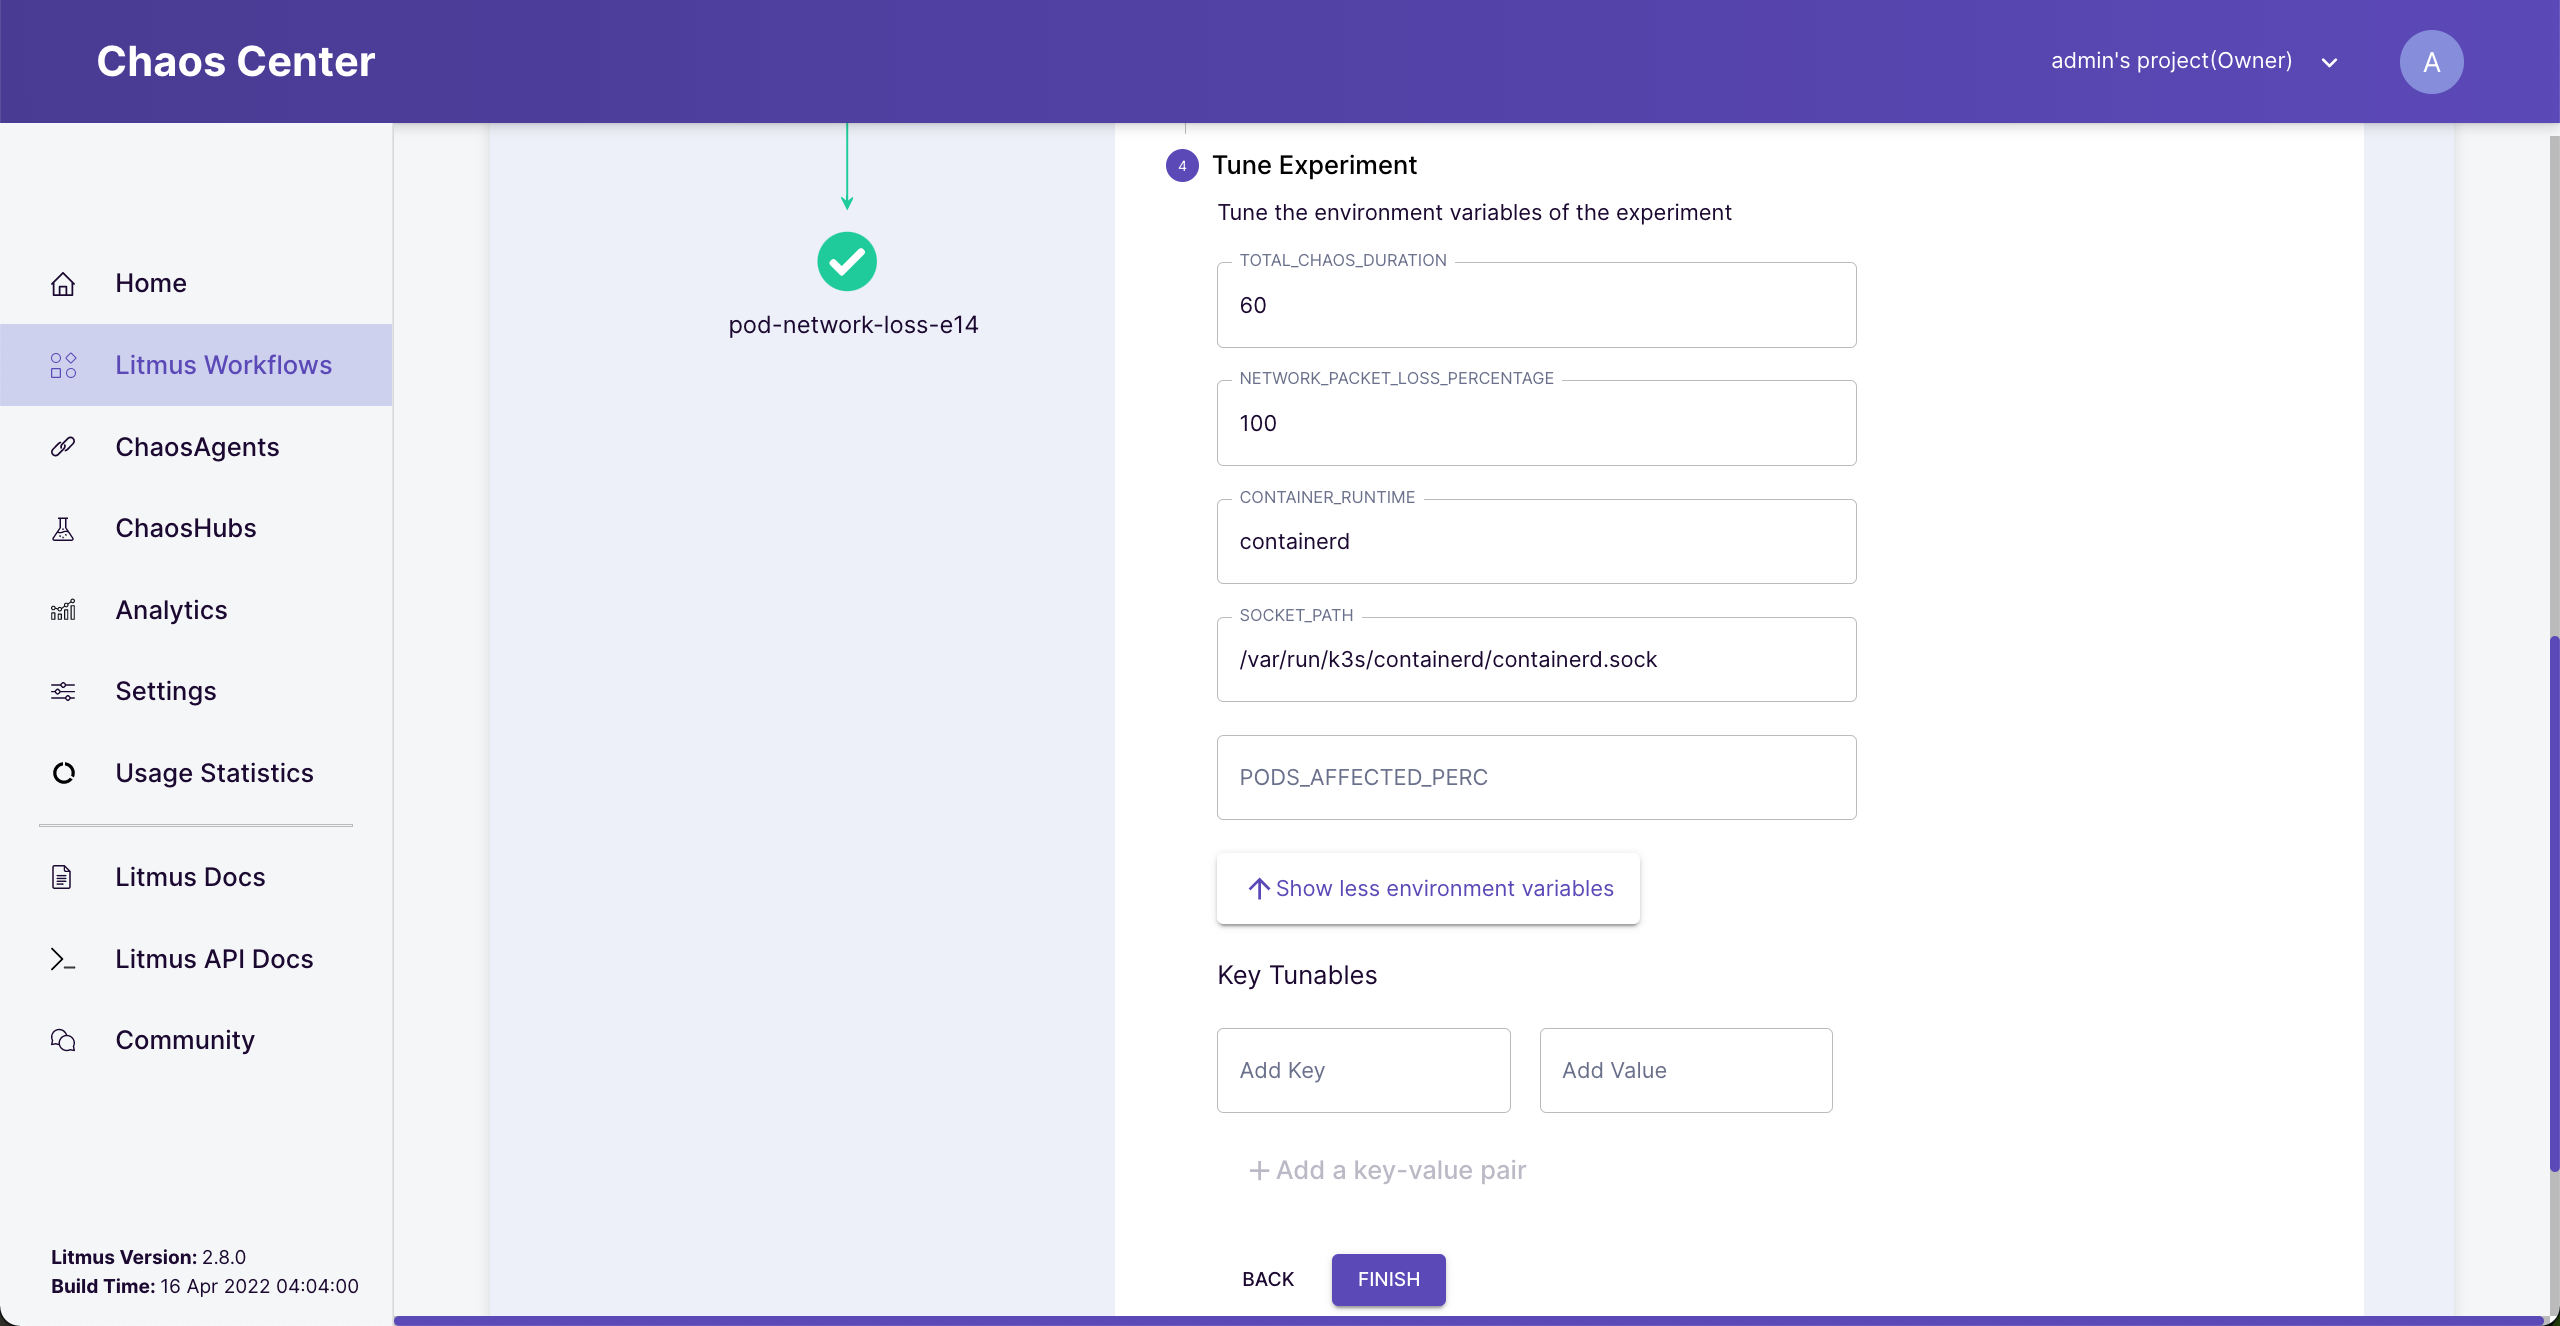 Tune experiment
This experiment will inject 100% package loss to the target for 60 seconds.
Container runtime - if your cluster uses docker, leave the default. This example uses containerd runtime.
Socket path - if you use a default docker installation, leave the default. This example, the cluster is k3s cluster, so socket path will be “/var/run/k3s/containerd/containerd.sock”
Click the “Finish” button and click “Next”.
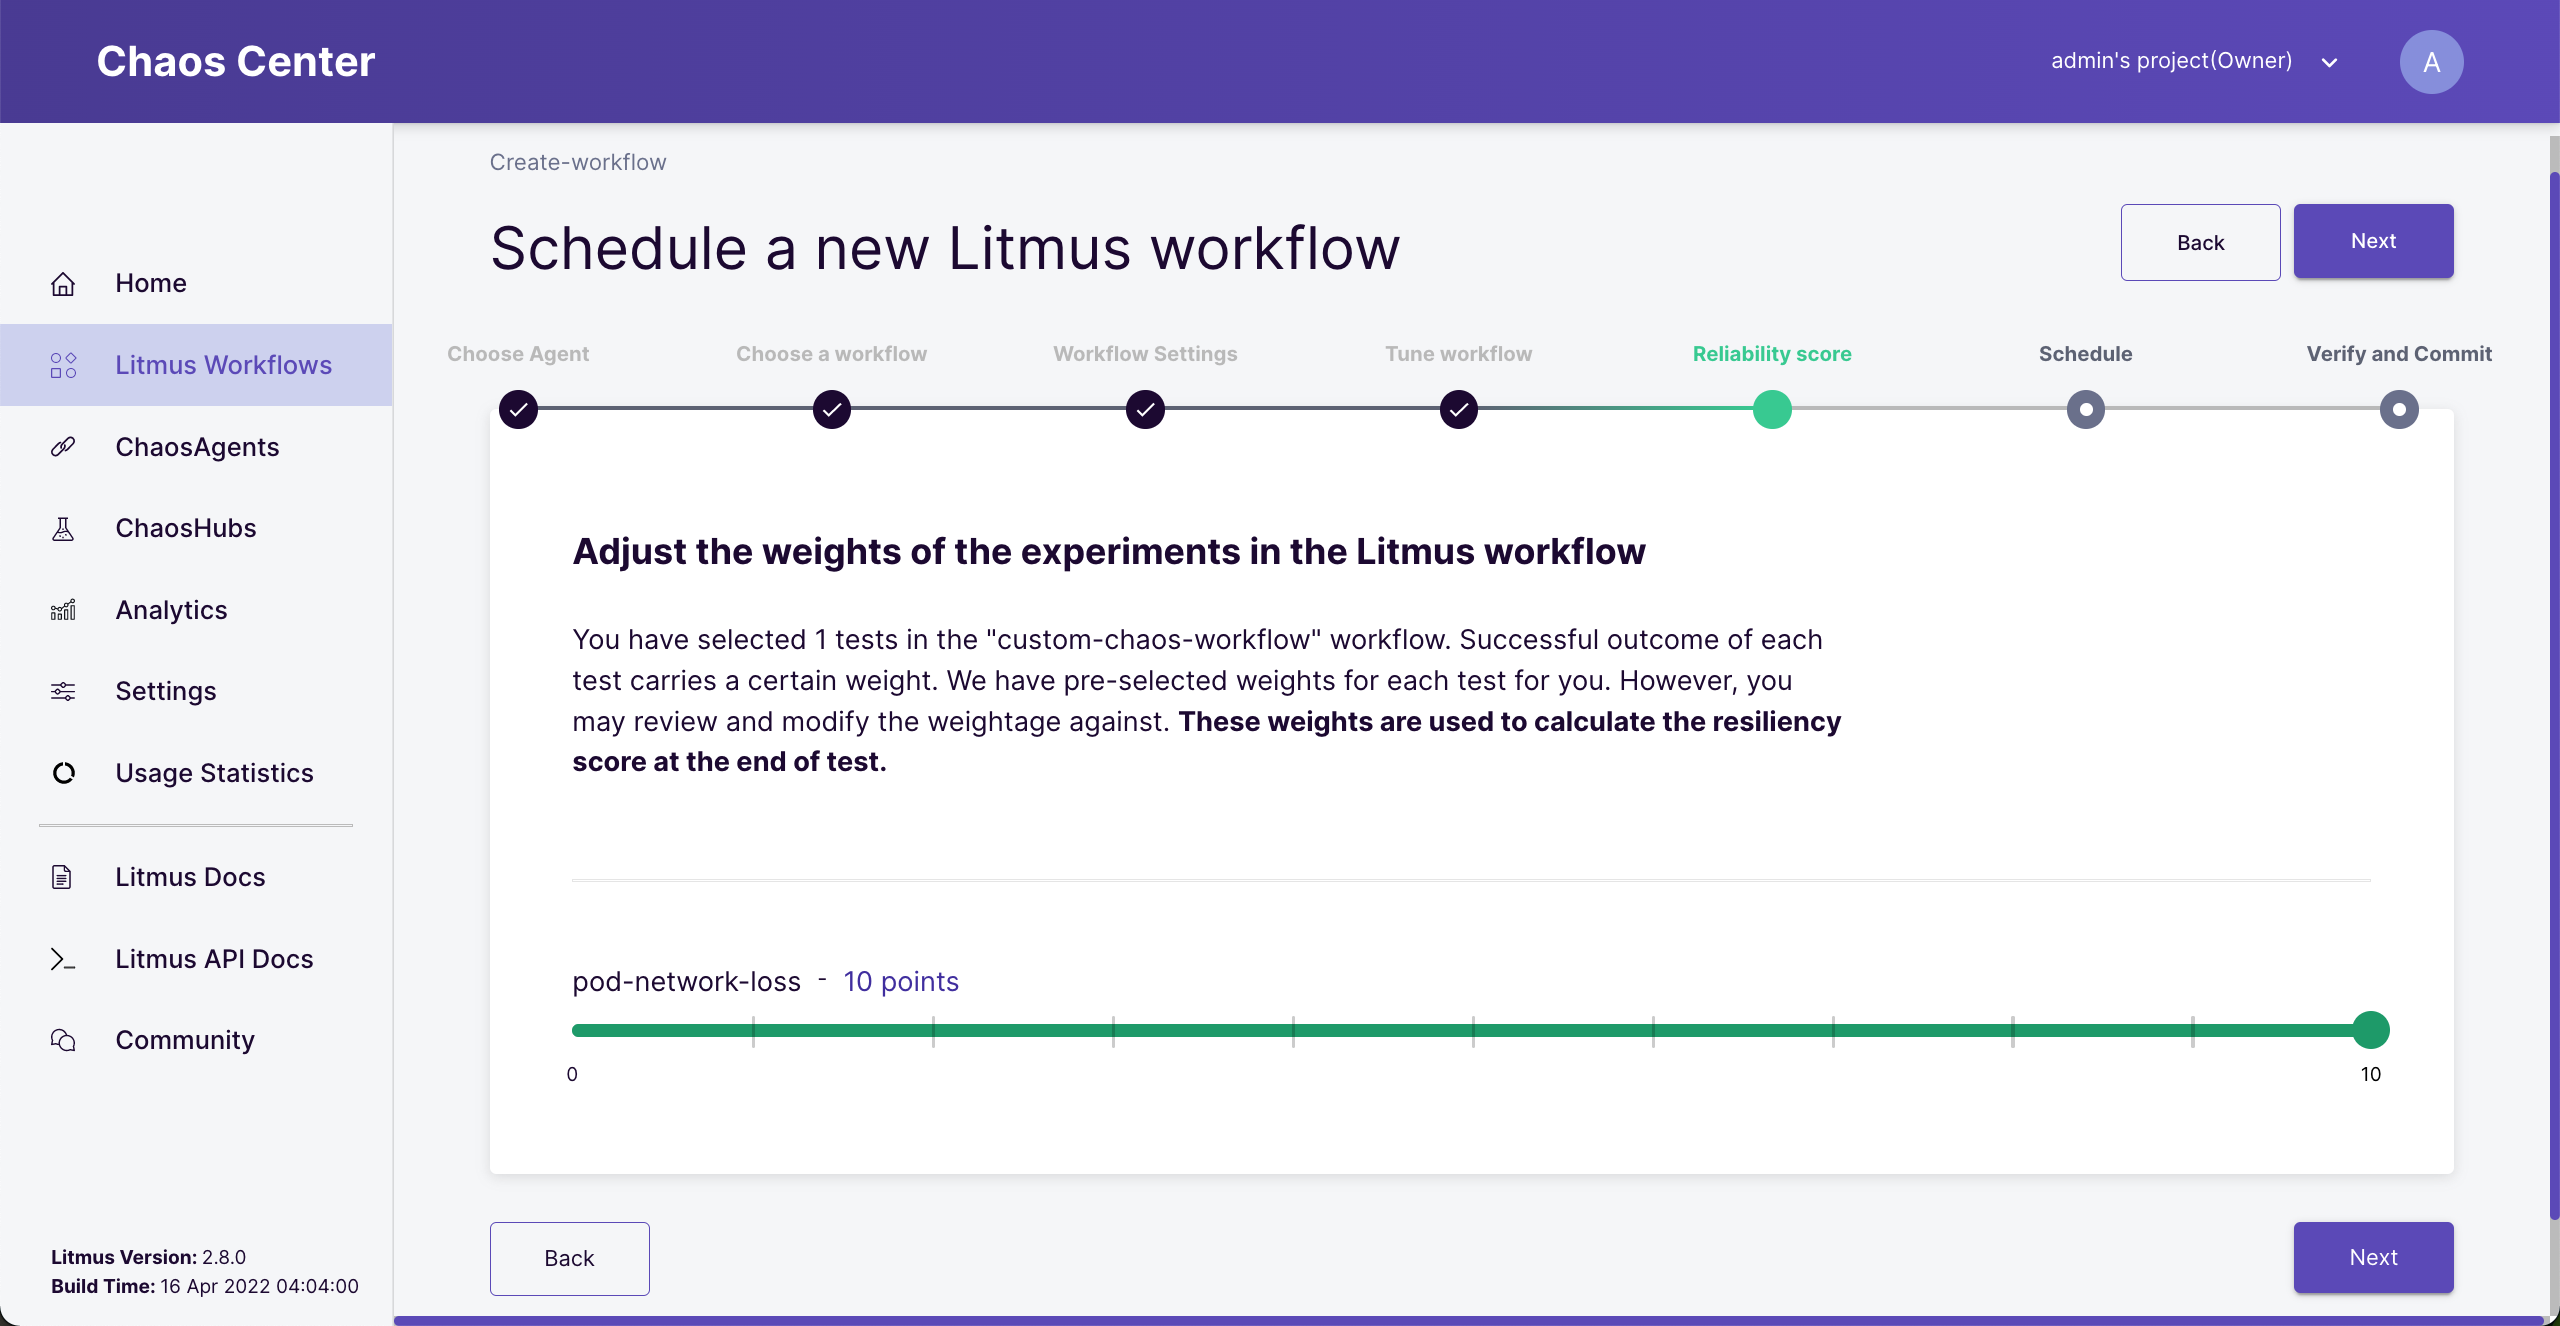 Assign experiment weight
Since we have only one experiment, the result of the experiment will contribute 100% weight.
Start the workflow
We are all set. Choose “Schedule now” and “Next” then “Finish”. Go to “Workflows” to see the running status.
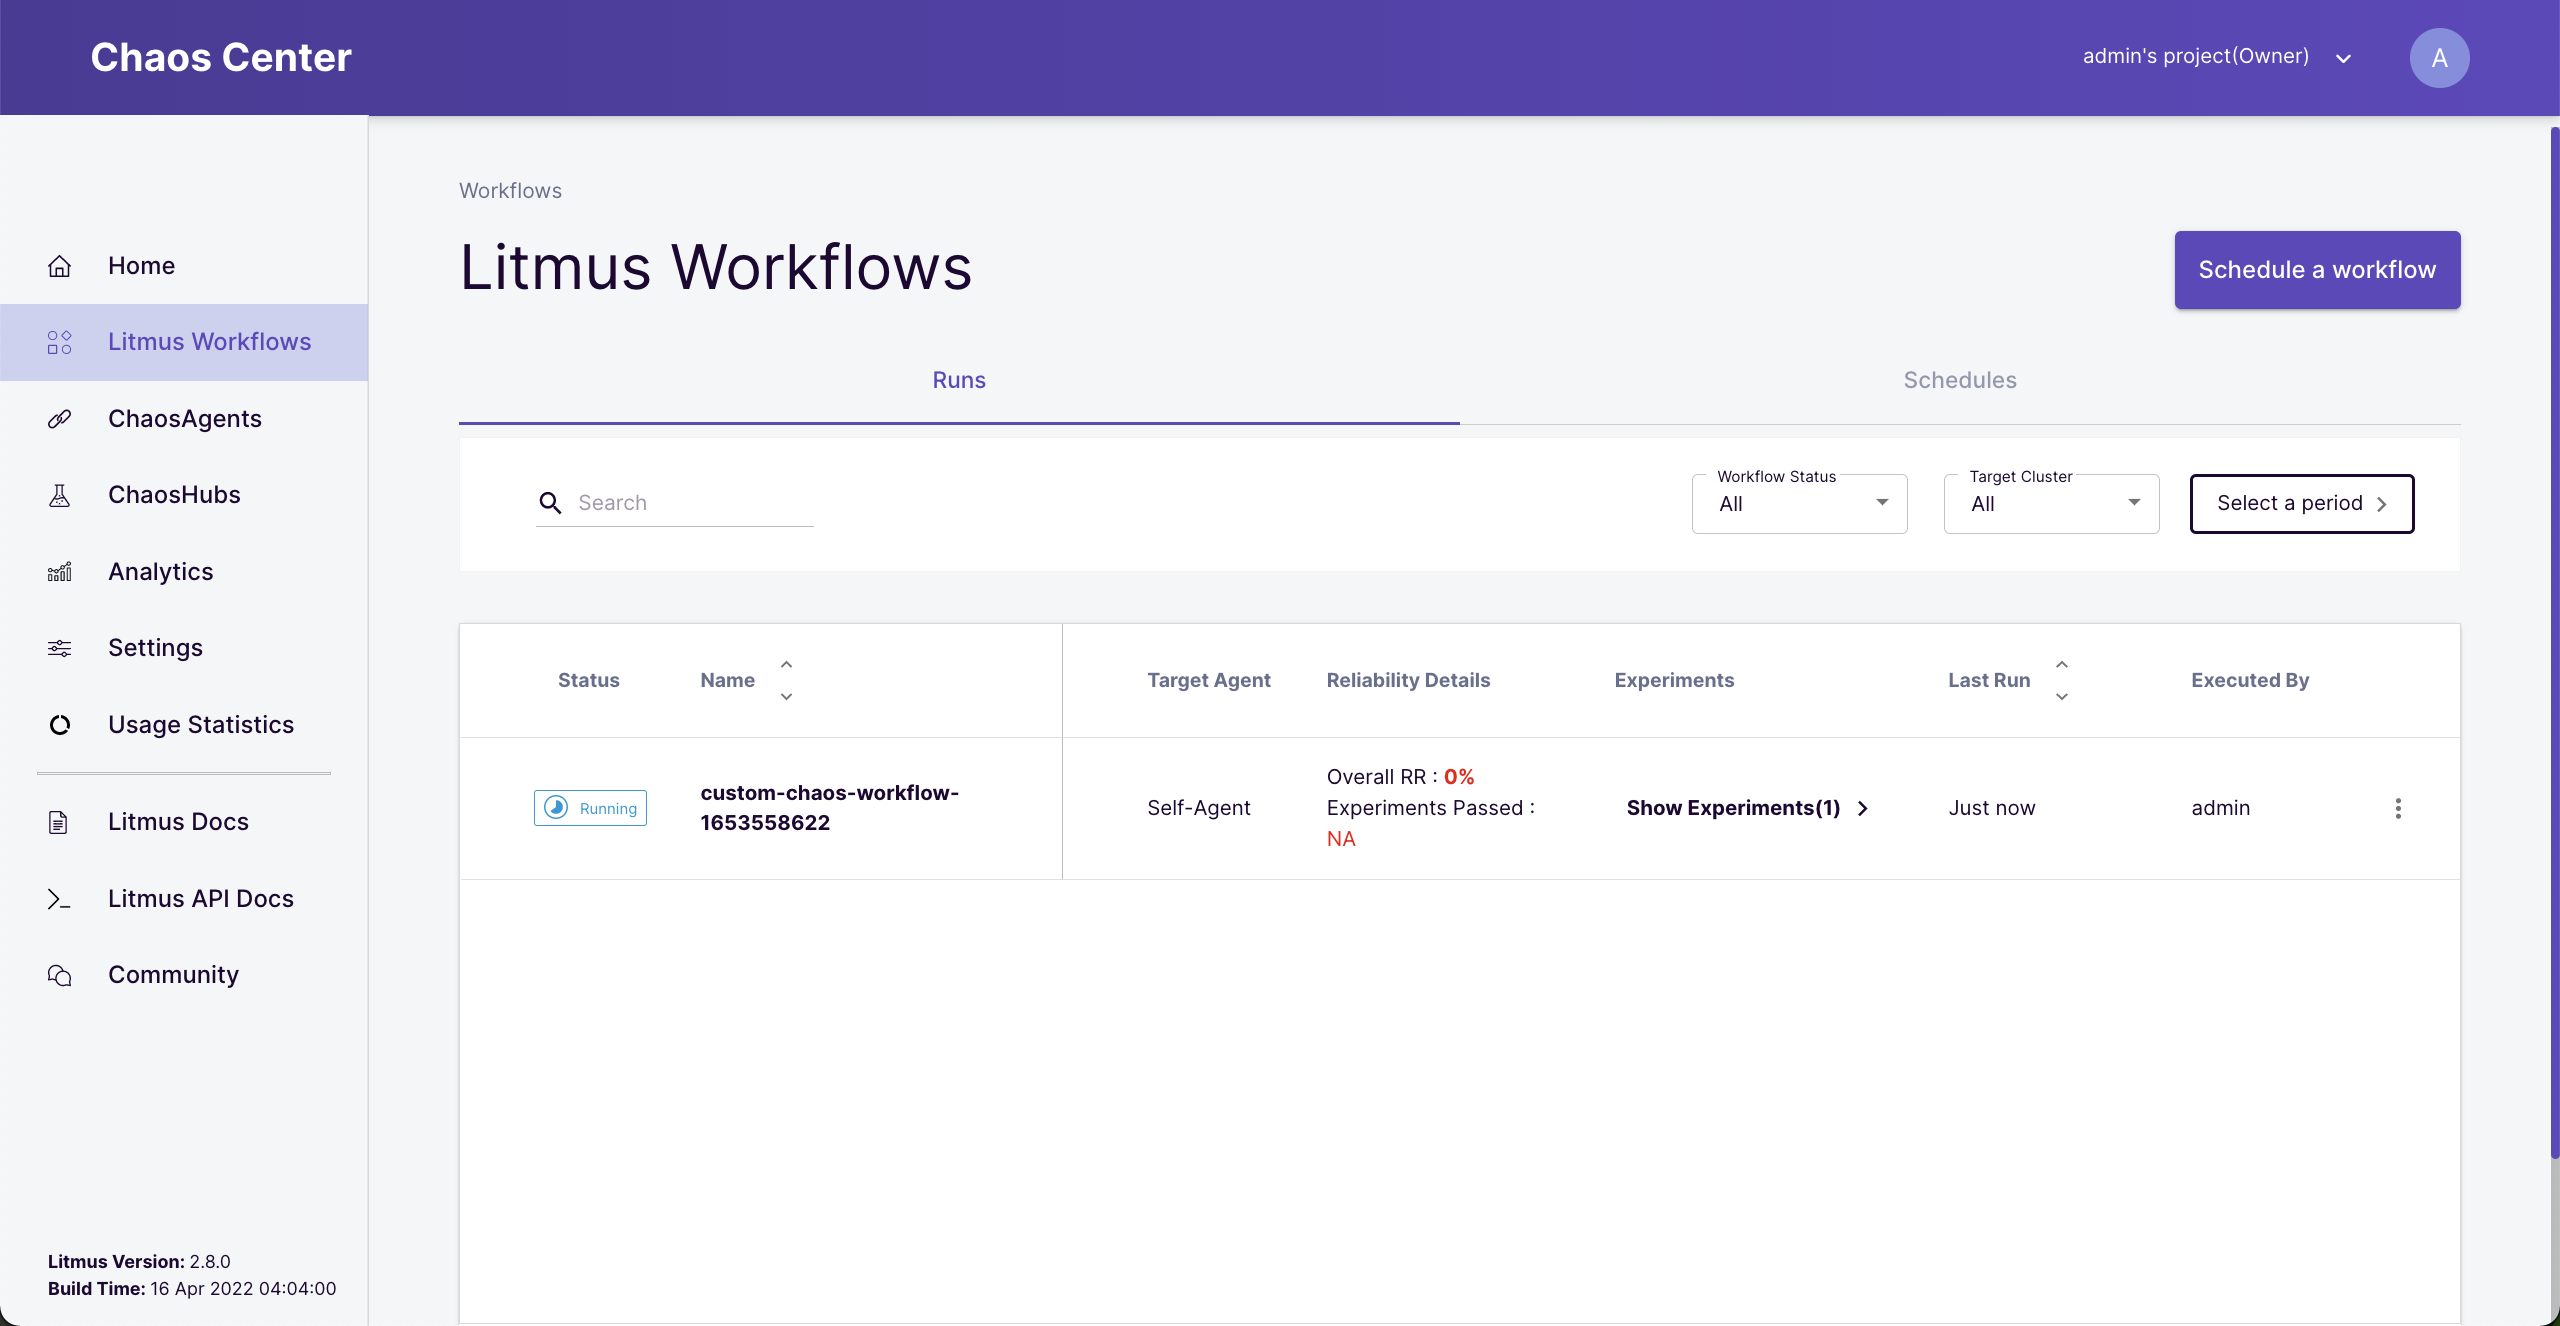 Running workflow
See the failed result
Sit back and wait for the experiment to run. Click on the name of the workflow to see details.
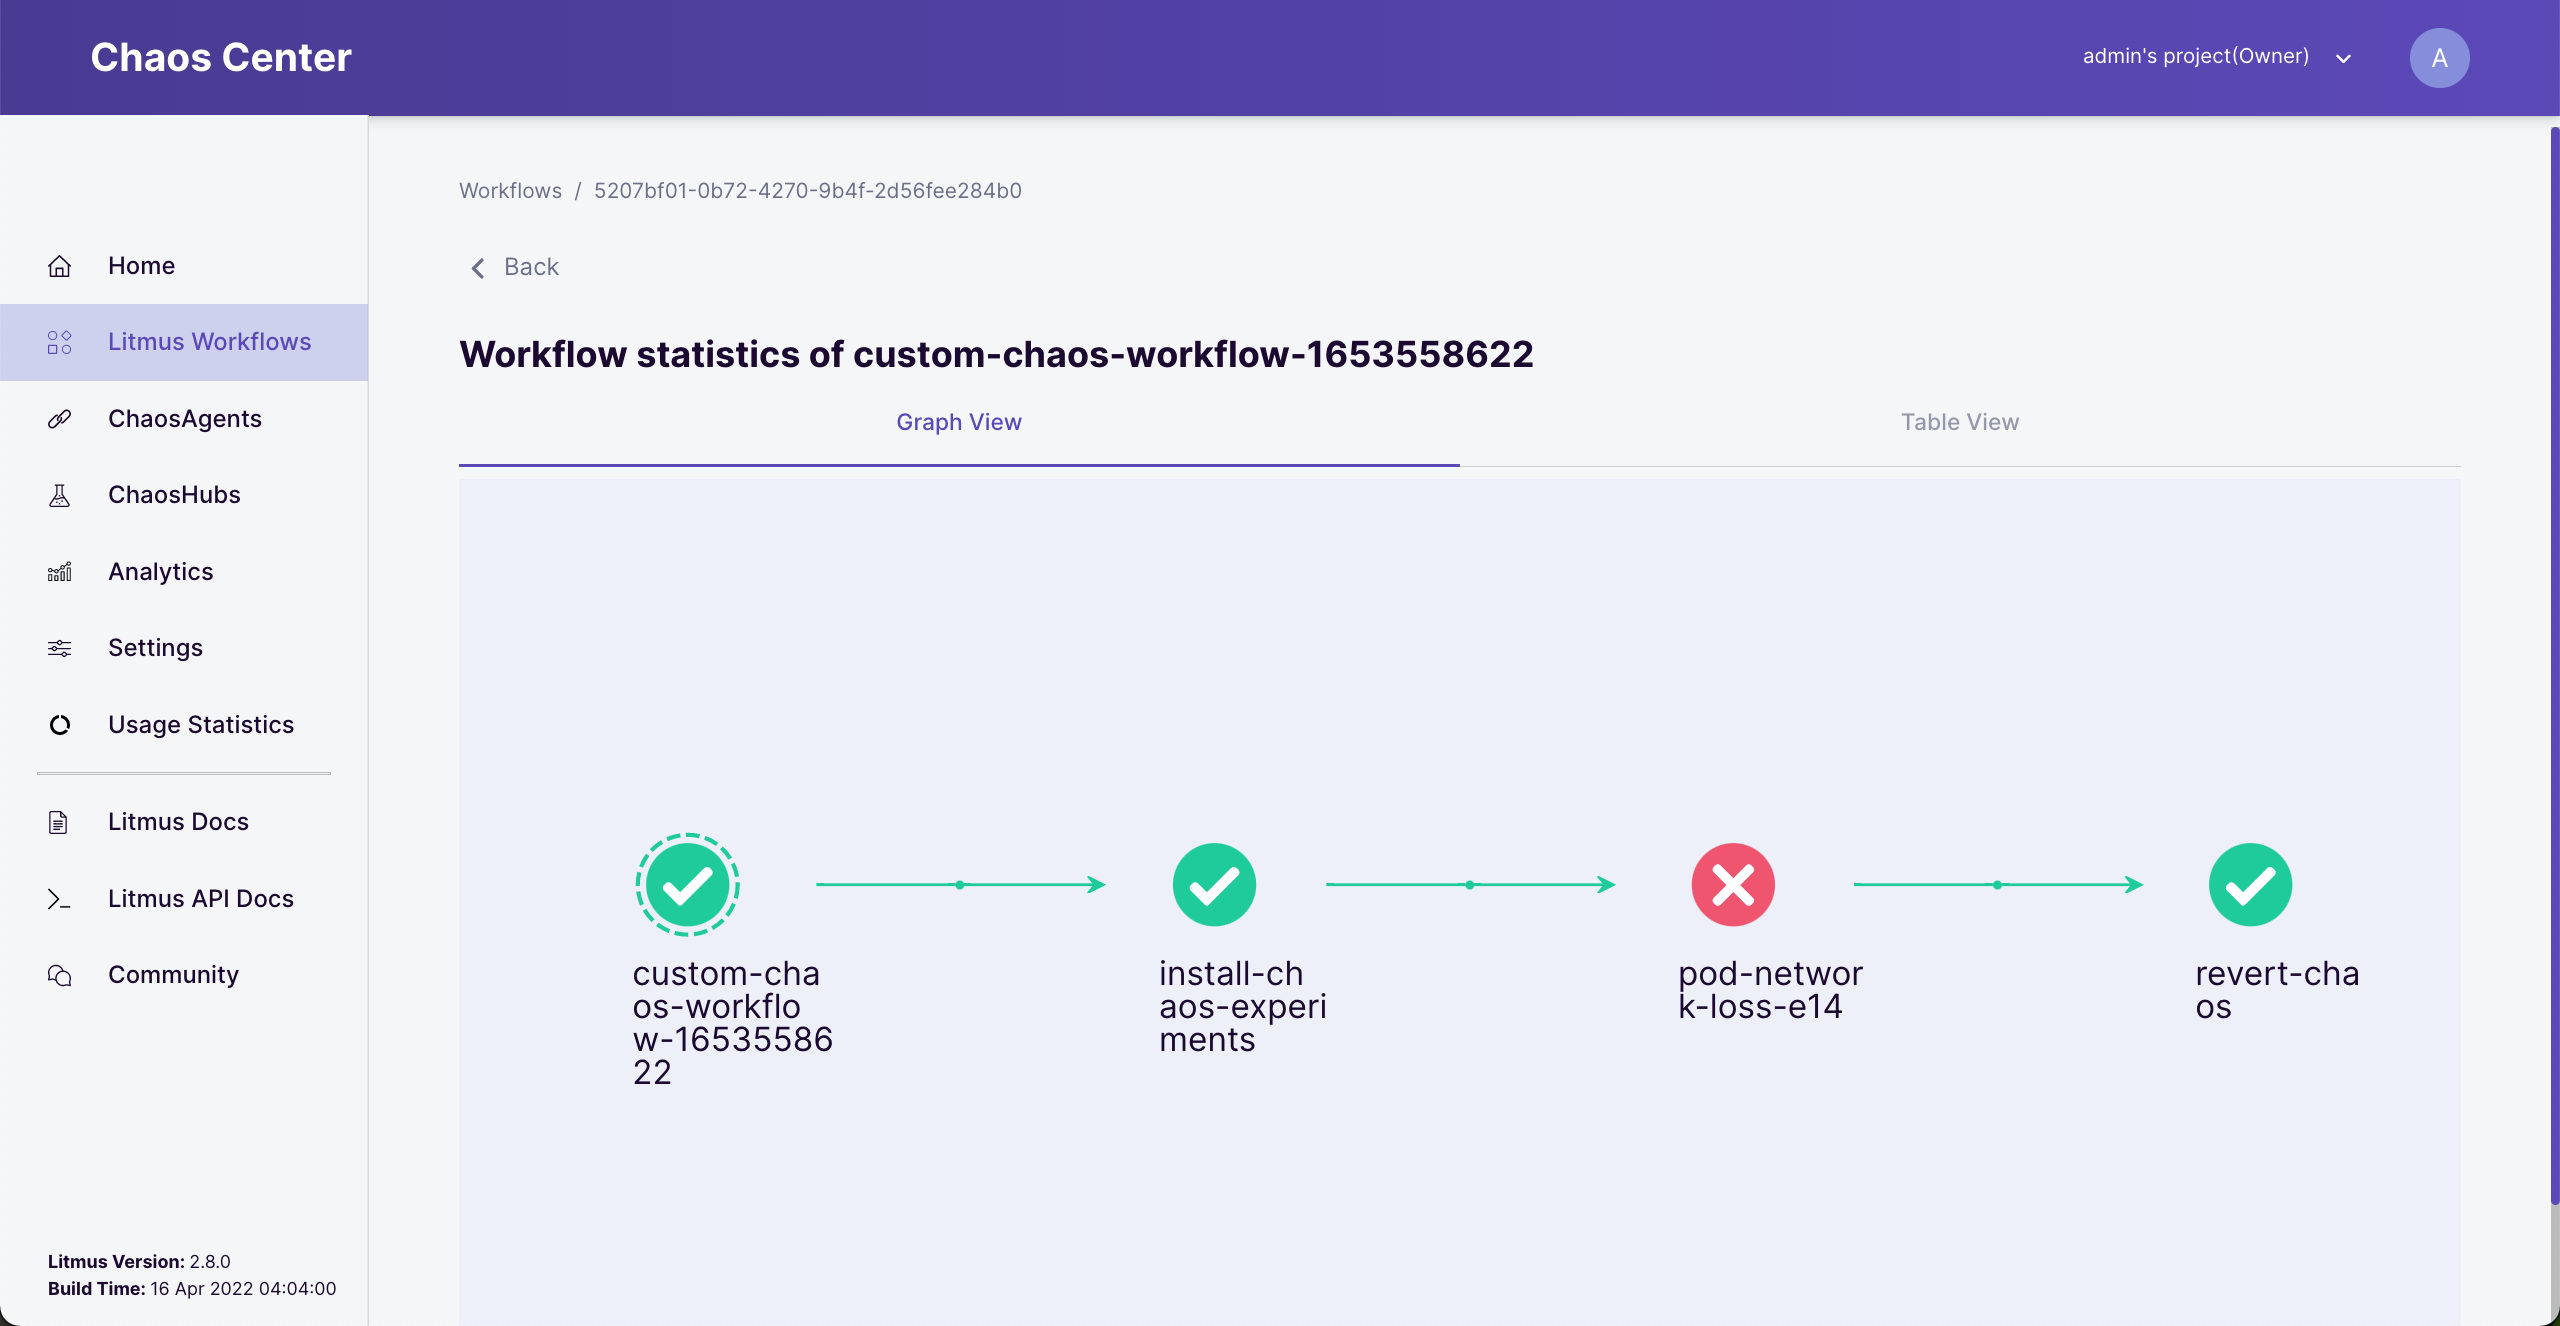 Failed workflow
You should see the failed state icon at the pod-network-lose step.
The experiment failed because our consumer-app API called to provider-app API which was injected network loss fault so it cannot accept any requests while the experiment was running.
Fix consumer-app
Next, we will make some changes to the consumer-app API to be more resilient.
Open file “ProviderServiceImpl.java” under “consumer-app” folder.
// Before fixing
@Service
public class ProviderServiceImpl implements ProviderService {
    private ProviderClient providerClient;

    public ProviderServiceImpl(ProviderClient providerClient) {
        this.providerClient = providerClient;
    }

    @Override
    public String data() throws RestClientException {
        return providerClient.data();
    }

    @Override
    public String consume() {
        return providerClient.consume(); // consumer-app calls to provider-app here
    }
}
method consumer() makes call to provider-app and when provider-app has a network problem, it fails here.
To overcome this problem, we will use a circuit breaker pattern.
We need to add Java circuit breaker library dependencies.
Open the “pom.xml” file and add this snippet.
        ...
        <dependency>
            <groupId>org.springframework.boot</groupId>
            <artifactId>spring-boot-starter-actuator</artifactId>
        </dependency>

        <!-- add this 2 blocks below -->
        <dependency>
            <groupId>io.github.resilience4j</groupId>
            <artifactId>resilience4j-spring-boot2</artifactId>
            <version>1.7.1</version>
        </dependency>
        <dependency>
            <groupId>org.springframework.boot</groupId>
            <artifactId>spring-boot-starter-aop</artifactId>
        </dependency>
        ...
// After fixing
@Service
public class ProviderServiceImpl implements ProviderService {
    private ProviderClient providerClient;

    public ProviderServiceImpl(ProviderClient providerClient) {
        this.providerClient = providerClient;
    }

    @Override
    public String data() throws RestClientException {
        return providerClient.data();
    }

    @Override
    @CircuitBreaker(name = "CONSUME", fallbackMethod = "fallback")
    public String consume() {
        return providerClient.consume();
    }

    private String fallback(Throwable t) {
        return "default provider";
    }
}
In this example, the Circuit breaker will detect that the calls to provider-app failed, so it will not keep calling, instead returning the default result by calling “fallback” method.
If you use the “skaffold”, just save and wait for the deployment to be done. If you use something else, you will need to deploy the change to your cluster.
Rerun experiment
Rerun the workflow again by selecting the failed workflow and clicking “Rerun Schedule”.
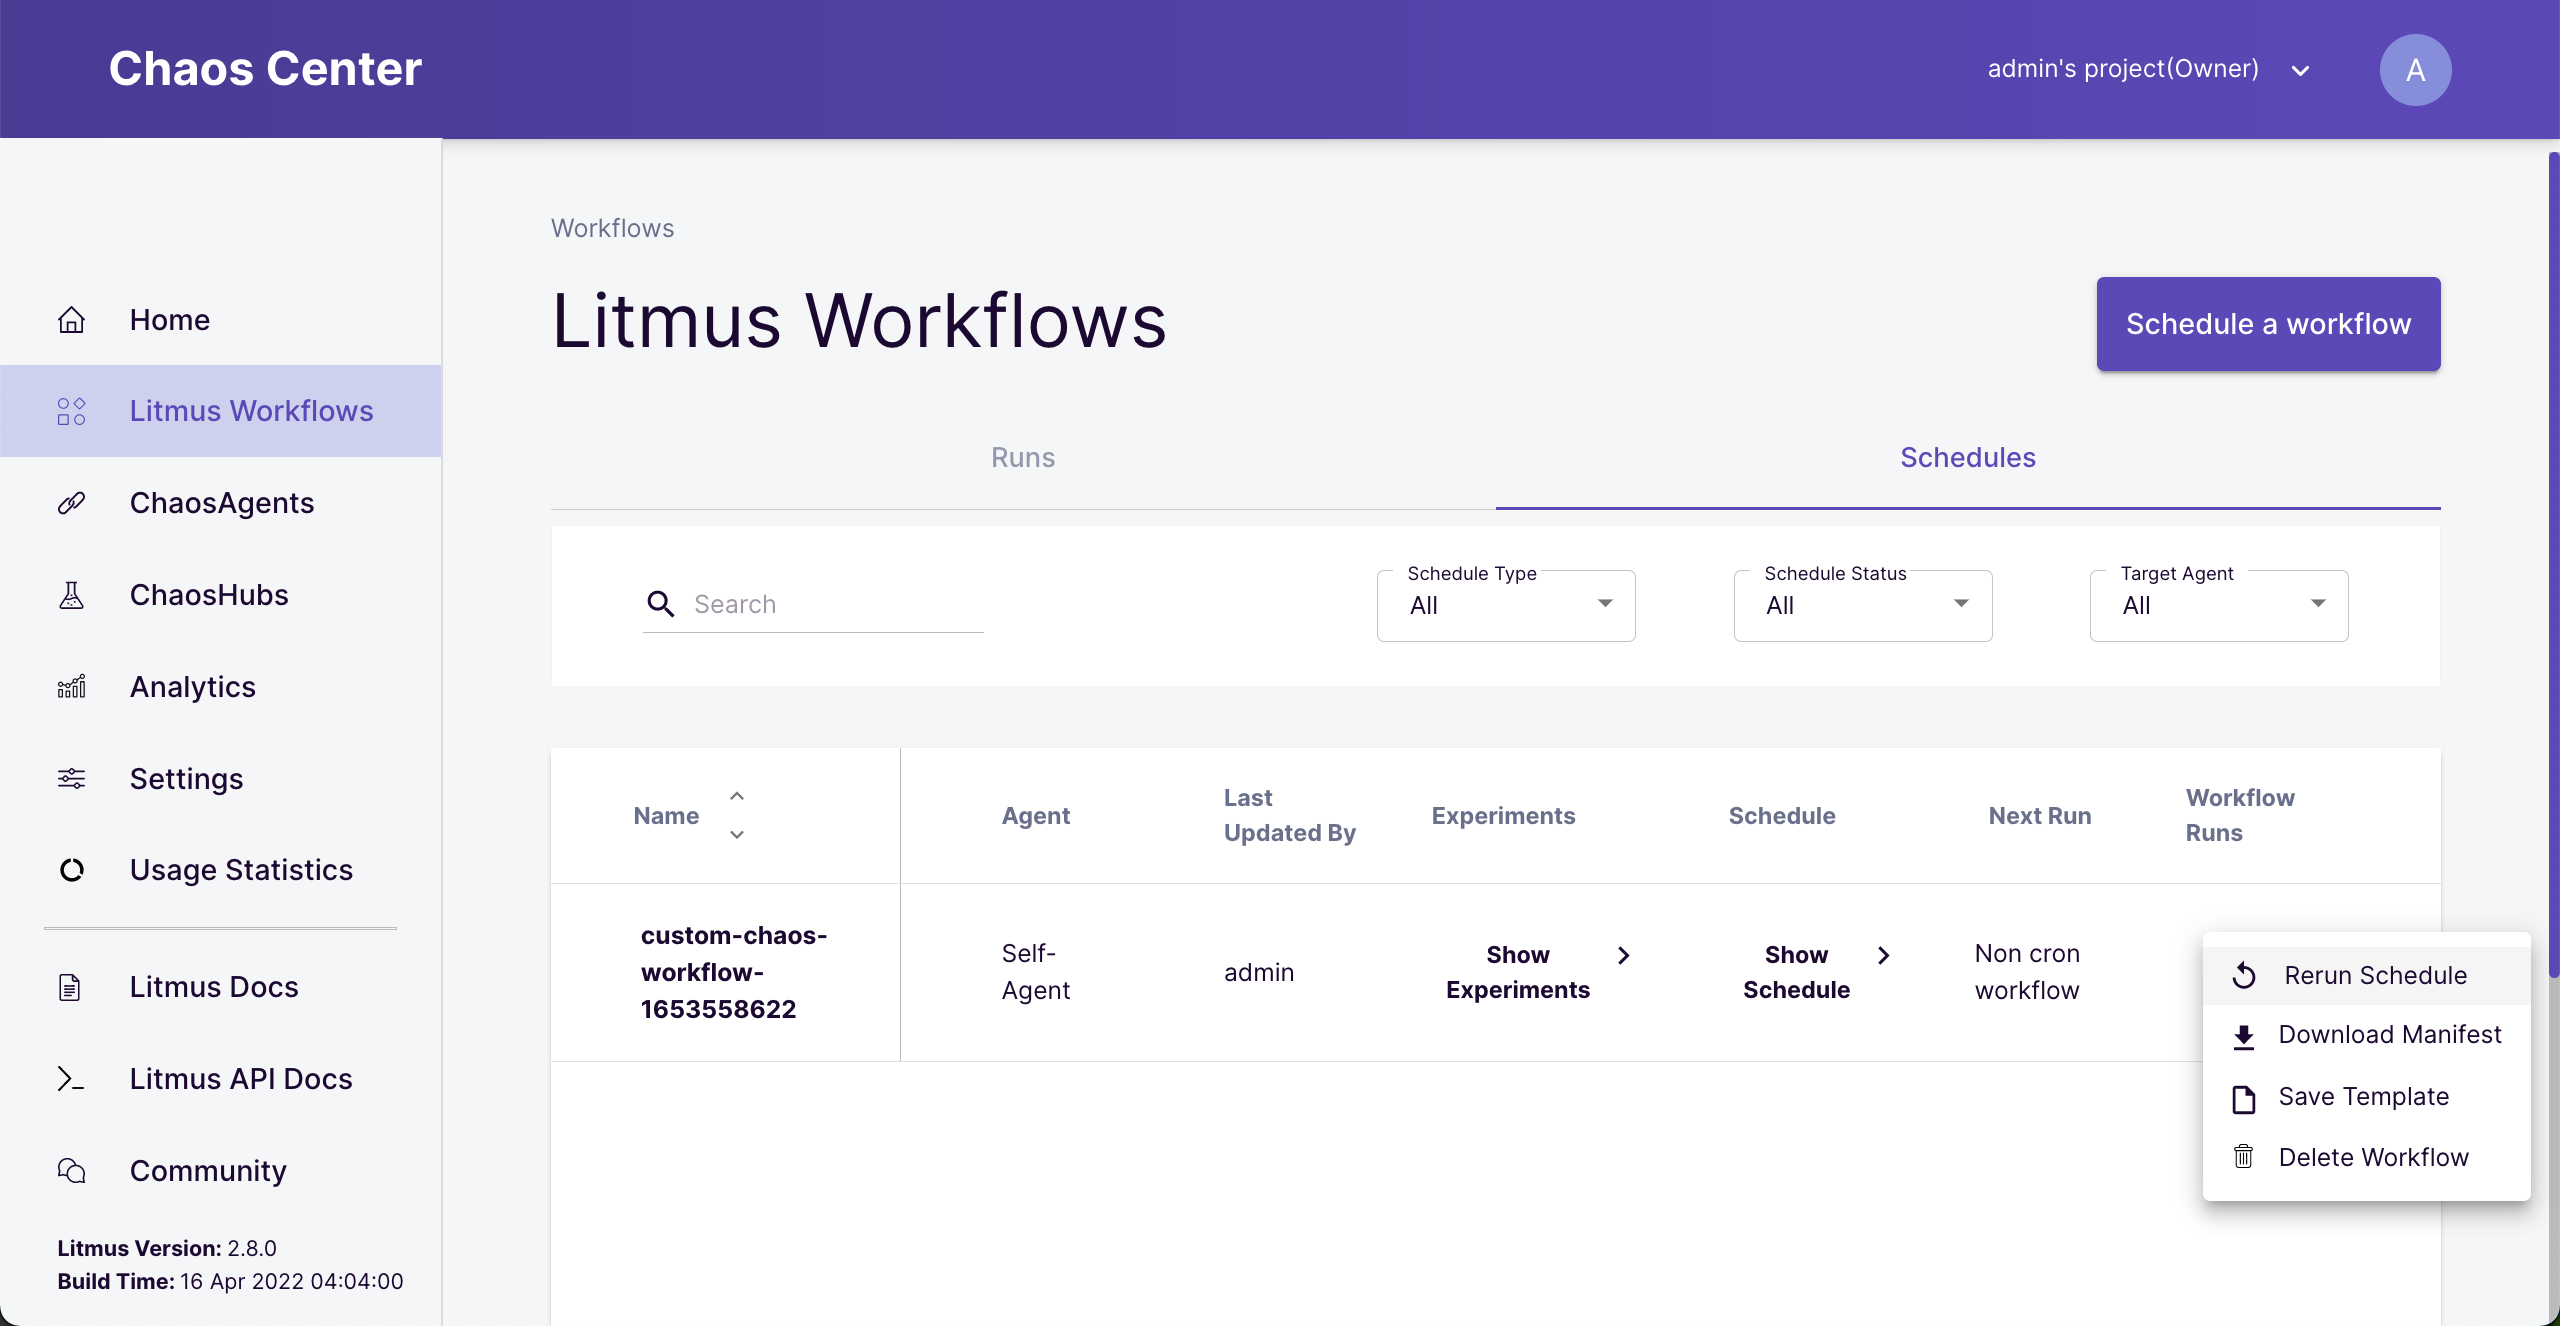 Rerun failed workflow
See the successful result
Sit back and wait one more time. If things go well, you should see the successful result as below.
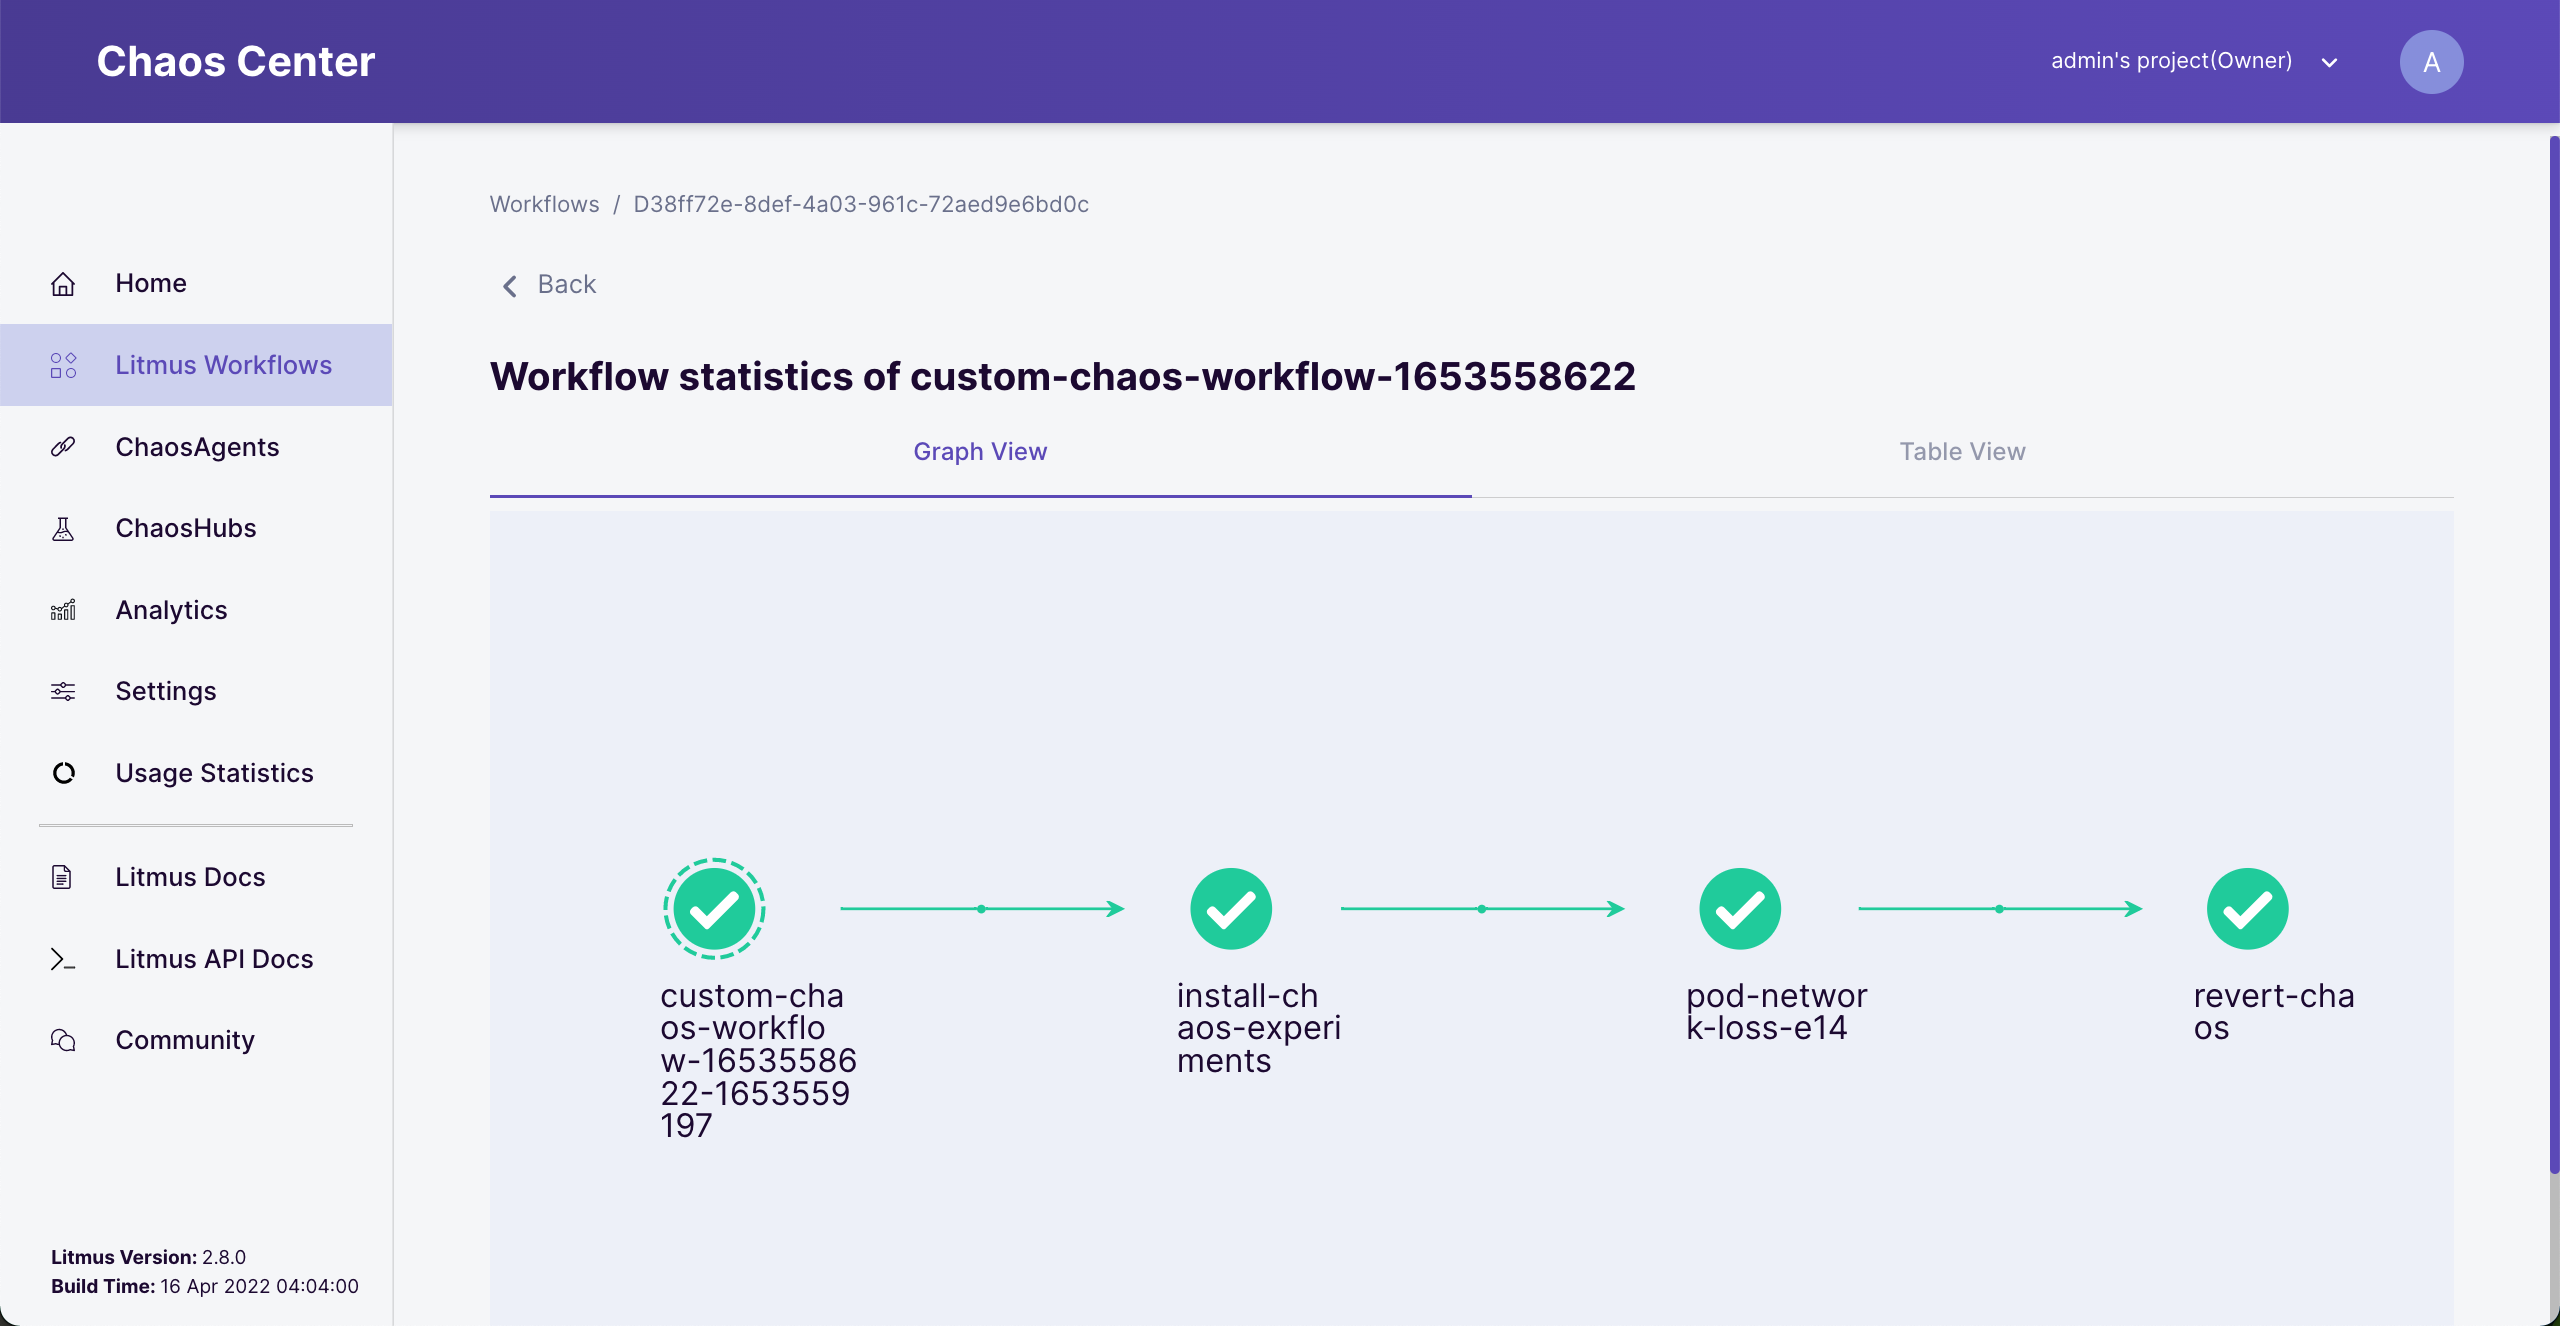 Success workflow
 Run workflows
Congratulation!! You have become a Chaos Engineer.
Conclusion
We learn a basic concept and put our hands on Chaos Engineering. In the real world, our complex applications have so many ways to fail. As an engineer, we should learn to understand the nature of faults and find a way to build applications that can tolerate these faults. Only a robust and reliable application can satisfy our users and survive in the long run.
This tutorial was inspired by a question from a QA in my team who asked me how to test the system in a failed state.
I recommend learning more about building robust software from this book “Designing Data-Intensive Applications”.