
Table of Contents:
- Background
- Why persistence storage
- Why Longhorn
- Prerequisite
- Install Longhorn
- Test with MySQL
- Conclusion
Background
In the previous post, we created a simple Kubernetes cluster we can experiment on. This post, we will make it more realistic by setting up a persistence storage for the cluster.
Why persistence storage
In Kubernetes, some applications are stateful applications which need to store data within itself such as MySQL database or Kaka. However, Kubernetes run workload as Pod which can be scheduled or rescheduled on any nodes. If a Pod store data in the node and then get rescheduled to the other node, the data will be lost. Kubernetes solves this through PV, PVC, Storage Class and CSI driver.
PV - Persistent Volume is a native resource that provide an abstract storage volume that a Pod can mount its volume to. A Kubernetes admin is responsible to create one of more PVs that attach to the actual storage such as hard disk or cloud provided storage.
PVC - Persistent Volume Claim is a native resource created along side a Pod which specifies a storage volume it needs. PVC consumes volume from PV.
Storage Class is a native resource to simplify the need for Admin to create PVs to support each PVC. Admin can create storage classes that represent available storage such as SSD or HDD or Cloud provided storage. Then, an application can specify storage class it needs in the PVC and the PV will be created automatically from the storage class.
CSI Driver is a software driver that installed in the Kubernetes cluster for PV and Storage Class to connect to the actual storage provider such as hard disk, SAN, cloud storage etc. This enables any provider to support Kubernetes by creating a driver that supports their storage.
Why Longhorn
As mentioned above, you cannot store your application data in a Kubernetes node. If you use a Kubernetes cloud provider like Amazon EKS, you can use their native solution to provide persistent storage. But when you build a Kubernetes cluster in a bare metal environment, your choice are limited. Normally, I will create an NFS server and use it as a default storage. When your Pod is rescheduled to another node, your data is still there on the NFS server.
Another interesting solution is in-cluster storage which uses all the nodes’ storage as a cluster storage so your data would not be lost when the Pod is moved to another node the same as NFS server. There are many in-cluster storage solution for Kubernetes, but they tend to be complex and hard to setup.
Longhorn is an in-cluster storage solution from Rancher who also creates K3s so it works well together. I also found that it’s quite easy to install and use through a built-in UI.
Prerequisite
- A Kubernetes cluster. I assume that you created K3s cluster following this post (There might not be a huge different with cluster with your own choice).
- Helm installed.
Install Longhorn
Install open-iscsi on every nodes
Skip this step if you created the cluster following my previous post, it’s already installed.
If not, you need to remote access to every nodes and run command below for Debain based OS. For other OS, see this guide.
sudo apt-get install open-iscsi
Install Longhorn using helm
Run this command on any client that can access the cluster and has Helm3 installed.
helm repo add longhorn https://charts.longhorn.io
helm repo update

kubectl create namespace longhorn-system
helm upgrade -i longhorn longhorn/longhorn --namespace longhorn-system
Note
Longhorn is installed in “longhorn-system” namespace.
Make Longhorn a default storage class
When we create a PVC without storage class specify, the default storage class will be used. By default, Longhorn will install itself as a default storage class.
However, if you created the cluster following my previous post, there will already be an existing default storage class “local-path” which we need to unset.
To unset “local-path” as a default storage class, we need to override the K3s default configuration.
Log in to the master node and run these commands.
sudo cp /var/lib/rancher/k3s/server/manifests/local-storage.yaml /var/lib/rancher/k3s/server/manifests/custom-local-storage.yaml

sudo sed -i -e "s/storageclass.kubernetes.io\/is-default-class: \"true\"/storageclass.kubernetes.io\/is-default-class: \"false\"/g" /var/lib/rancher/k3s/server/manifests/custom-local-storage.yaml
Note
These commands will.
- Copy the default “local-storage.yaml” to “custom-local-storage.yaml”.
- Set the annotation “storageclass.kubernetes.io/is-default-class” to false.
Verify the installation
Run this command.
kubectl get pod -n longhorn-system
Wait for a few minutes. A success installation should look something like this.
NAME                                        READY   STATUS    RESTARTS   AGE
longhorn-ui-5879656c55-v85wb                1/1     Running   0          110s
longhorn-manager-fmsww                      1/1     Running   0          110s
longhorn-driver-deployer-5d45dcdc5d-vps22   1/1     Running   0          110s
longhorn-manager-f9cx4                      1/1     Running   0          110s
longhorn-manager-r48kc                      1/1     Running   0          110s
longhorn-csi-plugin-6zc68                   2/2     Running   0          54s
csi-resizer-6696d857b6-gsspm                1/1     Running   0          55s
longhorn-csi-plugin-j6m22                   2/2     Running   0          54s
longhorn-csi-plugin-fczh4                   2/2     Running   0          54s
csi-provisioner-5c9dfb6446-ld7cn            1/1     Running   0          55s
csi-provisioner-5c9dfb6446-hldqz            1/1     Running   0          55s
csi-resizer-6696d857b6-zfx9n                1/1     Running   0          55s
csi-attacher-5dcdcd5984-g25sw               1/1     Running   0          55s
csi-resizer-6696d857b6-f52z2                1/1     Running   0          55s
csi-snapshotter-96bfff7c9-v4kmg             1/1     Running   0          54s
csi-attacher-5dcdcd5984-dx9k5               1/1     Running   0          55s
csi-snapshotter-96bfff7c9-2jzm9             1/1     Running   0          54s
csi-snapshotter-96bfff7c9-k2pbb             1/1     Running   0          54s
csi-attacher-5dcdcd5984-m79v9               1/1     Running   0          55s
csi-provisioner-5c9dfb6446-b2gtn            1/1     Running   0          55s
instance-manager-e-a25d29b3                 1/1     Running   0          71s
instance-manager-r-fe670be6                 1/1     Running   0          70s
instance-manager-e-b95b1811                 1/1     Running   0          80s
instance-manager-r-1c5322e2                 1/1     Running   0          80s
instance-manager-e-4ef53dc6                 1/1     Running   0          76s
instance-manager-r-d012e56e                 1/1     Running   0          76s
engine-image-ei-611d1496-kg52d              1/1     Running   0          80s
engine-image-ei-611d1496-pdgx2              1/1     Running   0          80s
engine-image-ei-611d1496-t4qzv              1/1     Running   0          81s
Run this command to forward Longhorn UI port.
kubectl port-forward -n longhorn-system svc/longhorn-frontend 8080:80
Open Longhorn UI at http://localhost:8080.
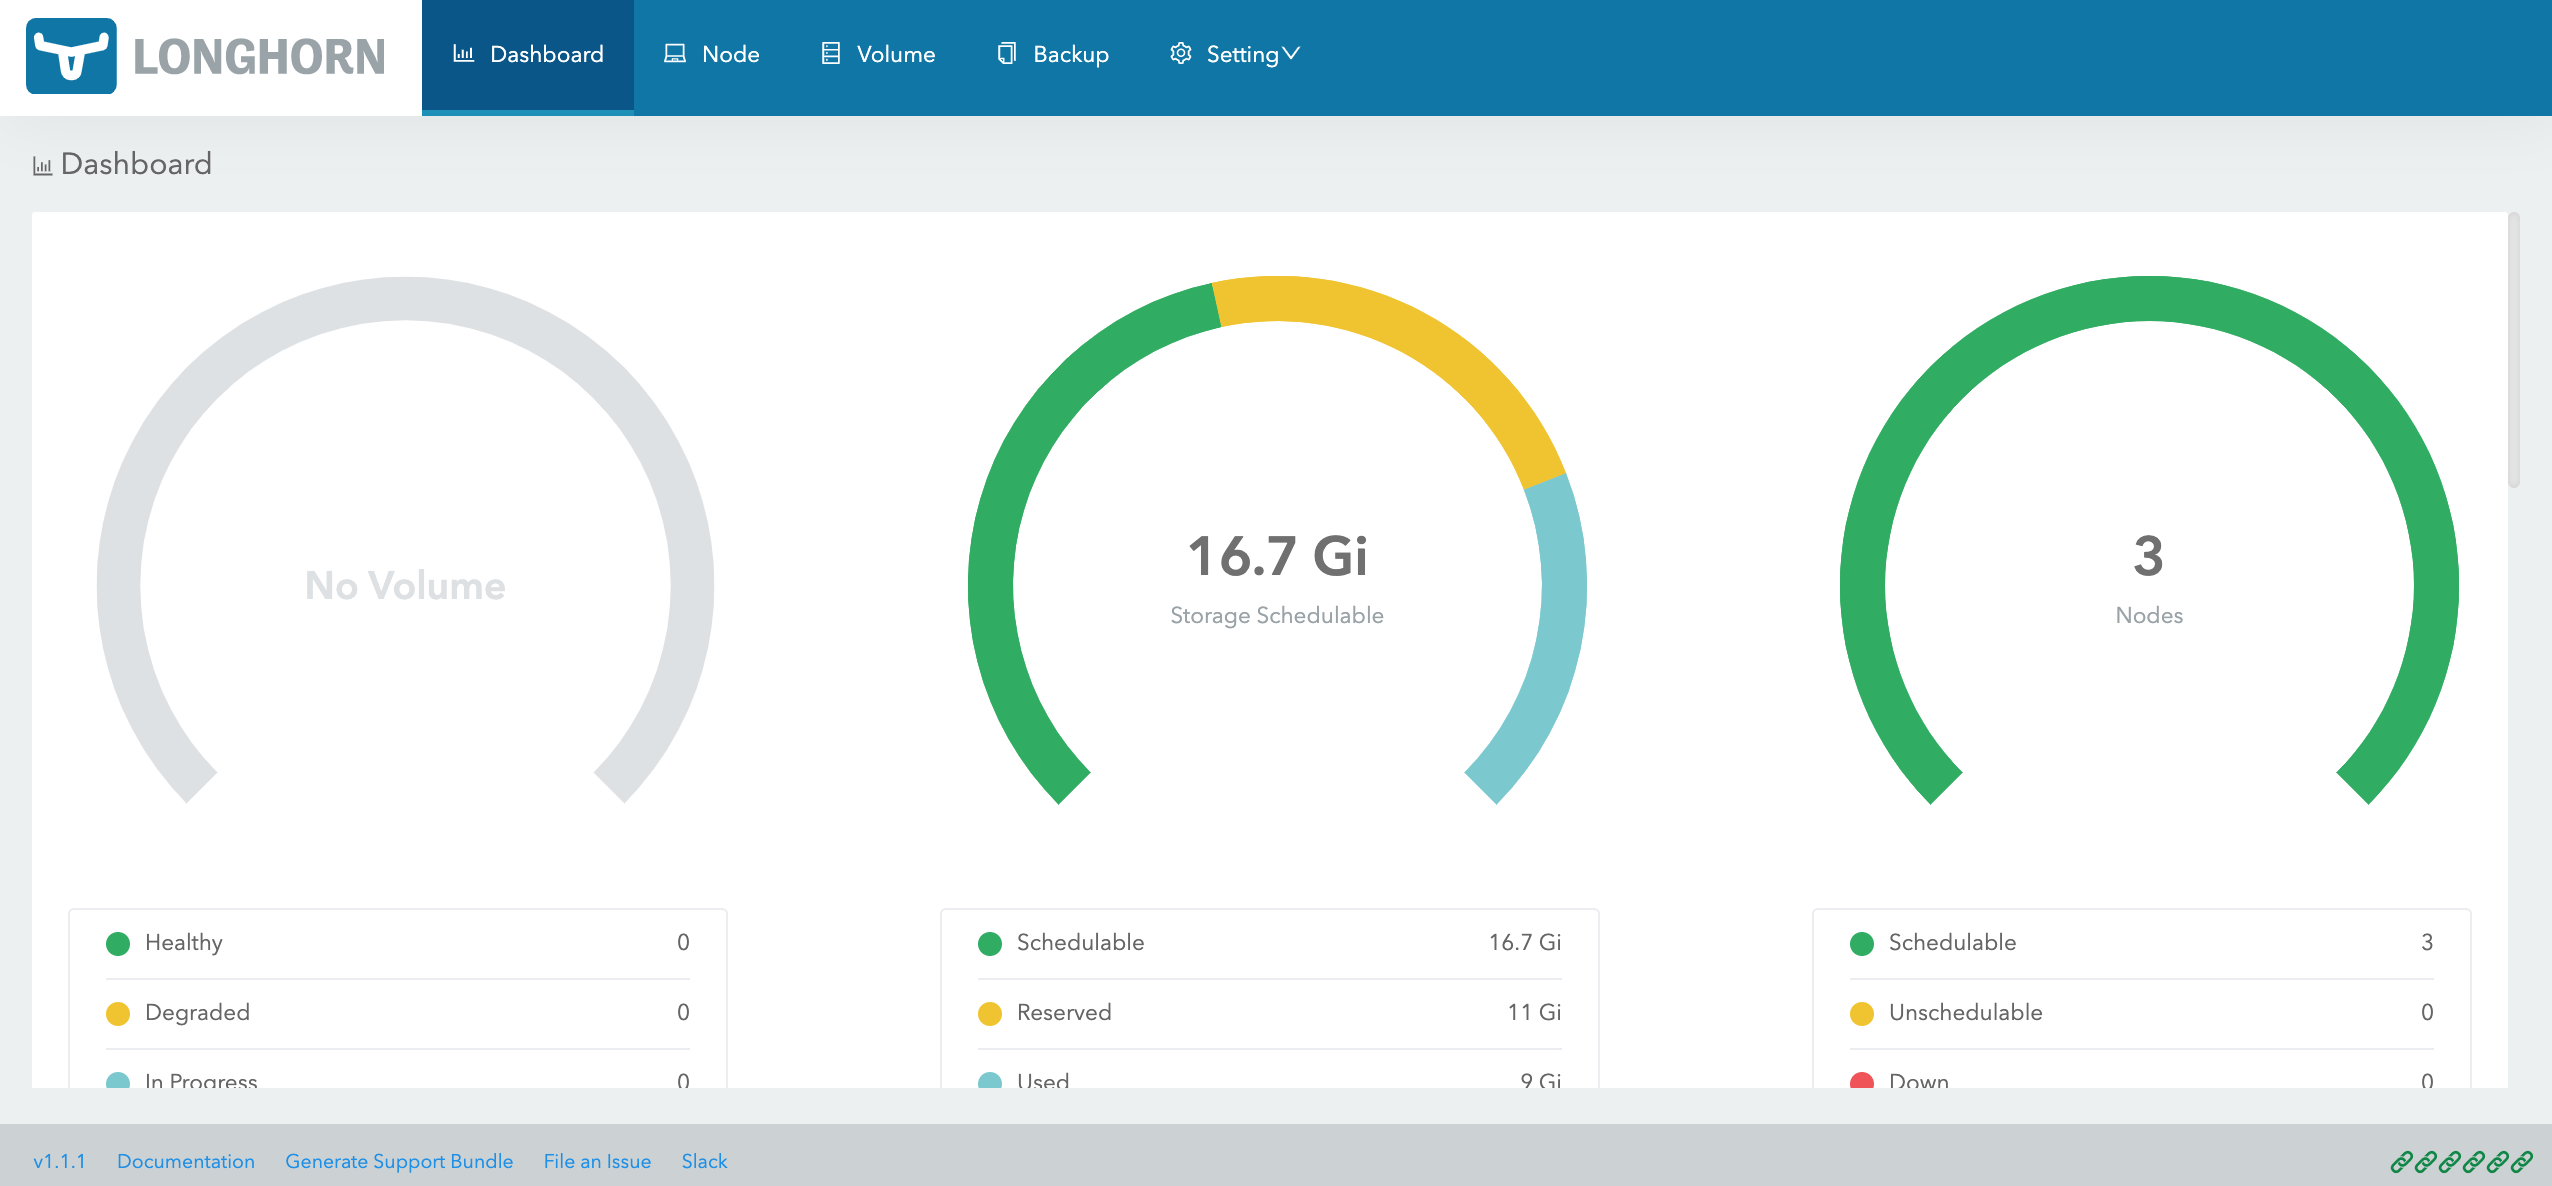 Longhorn UI shows current status of the storage
Test with MySQL
MySQL is a database so it needs to be a stateful application in Kubernetes.
Install MySQL from bitnami using helm.
helm repo add bitnami https://charts.bitnami.com/bitnami

helm upgrade -i mysql \
  --set auth.rootPassword=secretpassword,auth.database=demodb \
  --set auth.replicationPassword=secretpassword \
  --set architecture=replication \
  --set primary.persistence.size=1Gi \
  --set secondary.persistence.size=1Gi \
  --set secondary.replicaCount=2 \
    bitnami/mysql
Note
In this example, we installed 1 primary and 2 secondary replicas with 1GB storage each. Root password will be “secretpassword”. Default database will be “demodb”
Open Longhorn UI at http://localhost:8080/#/volume and you will see that there are 3 volumes created, 1 for primary and 2 for secondary (You might need to wait for sometimes).
 Longhorn UI shows created volumes
Access the database using MySQL Client.
kubectl run mysql-client --rm --tty -i --restart='Never' --image docker.io/bitnami/mysql:8.0.25-debian-10-r35 --namespace default --command -- bash
Note
This command will create a temporary mysql-client pod in the cluster so you can access MySQL instance in the cluster. To access the database from outside the cluster, you will need to setup an ingress for it.
Access to MySQL primary node.
mysql -h mysql-primary.default.svc.cluster.local -uroot -p demodb

# enter password secretpassword
You should see mysql prompt like this.
I have no name!@mysql-client:/$ mysql -h mysql-primary.default.svc.cluster.local -uroot -p demodb
Enter password:
Welcome to the MySQL monitor.  Commands end with ; or \g.
Your MySQL connection id is 141
Server version: 8.0.25 Source distribution

Copyright (c) 2000, 2021, Oracle and/or its affiliates.

Oracle is a registered trademark of Oracle Corporation and/or its
affiliates. Other names may be trademarks of their respective
owners.

Type 'help;' or '\h' for help. Type '\c' to clear the current input statement.

mysql>
Create a sample table and data.
CREATE TABLE Books(Id INTEGER PRIMARY KEY, Title VARCHAR(100), Author VARCHAR(60));

INSERT INTO Books(Id, Title, Author) VALUES(1, 'War and Peace','Leo Tolstoy');
Select the sample data.
mysql> SELECT * FROM Books;
+----+---------------+-------------+
| Id | Title         | Author      |
+----+---------------+-------------+
|  1 | War and Peace | Leo Tolstoy |
+----+---------------+-------------+
1 row in set (0.00 sec)

mysql>
Congratulation! You have a working persistent storage to use in Kubernetes cluster.
Conclusion
In this post, we installed Longhorn to enable persistent storage for our Kubernetes cluster. Then we installed MySQL as an example of stateful application to the cluster. Other than providing persistent volumes, Longhorn also supports features like snapshot, backup to S3 or NFS, backup scheduling. Learn more about Longhorn here.