
Table of Contents:
Background
There are several ways to have your own Kubernetes cluster.
- Docker Desktop
- Minikube
- Cloud providers such as AWS, Azure, Google
- Kubeadm
- K3s
- Many more
Docker Desktop and Minikube are for development only purpose. They are simple to setup but quite limited in capabilities.
Cloud providers clusters are high cost and aren’t suite for experimentation.
Kubeadm and K3s are interesting. They are production ready and I found that they are not too hard to setup as a development cluster.
This post I will show you a step by step to setup a K3s cluster on Virtualbox virtual machine. My aim is to do it as simple as possible. We should be able to destroy and build a new one with ease.
Prerequisite
- Windows PC 64 bits
- Free RAM > 6GB
- Free disk space > 45GB
- Virtualbox installed
- Packer installed and PATH configured
Note.
- Virtualbox is a virtual machine software from Oracle. It supports many OS both linux and windows based.
- Packer is a software from Hashi Corp. It help automate the virtual machine building and support many platforms.
1. Build/Import/Start Virtualbox images
Our cluster will have 1 master node and 2 workers nodes. All of them will installed Ubuntu-16.04.7-server.
- master node: kubemaster (ip 192.168.1.61)
- worker node 1: kubenode1 (ip 192.168.1.62)
- worker node 2: kubenode2 (ip 192.168.1.63)
Warning. These ip are static. You may need to change them if they are not available in your network or your network use different subnet.
Clone repository
Clone below repository into your local machine.
git clone https://github.com/pongsatt/k3s.git
cd k3s
Download Ubuntu iso image
Download file ubuntu-16.04.7-server-amd64.iso and place it in folder “windows”.
There are several method to download iso file.
- Torrent: ubuntu-16.04.7-server-amd64.iso.torrent (Recommended)
- ISO: ubuntu-16.04.7-server-amd64.iso (can be slow)
- Or choose from http://releases.ubuntu.com/xenial/
Update network adapter
This setup uses Virtualbox bridge network which means all virtual machines will use host network so the build script needs to know your network adapter name to setup.
Go to “Control Panel\Network and Internet\Network Connections” and right click on adapter you use then click “Properties”
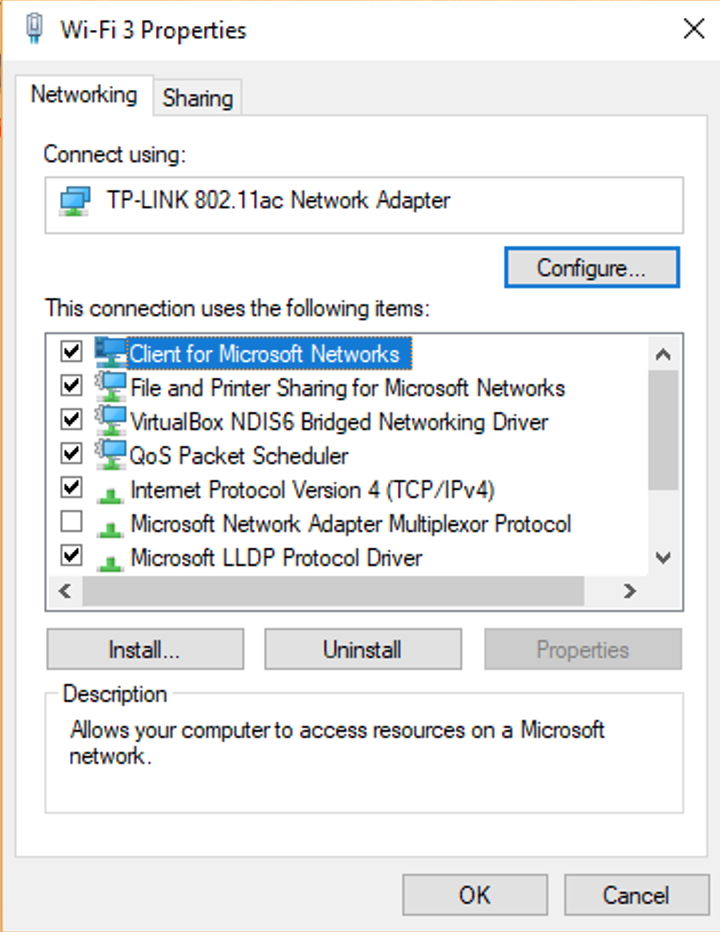 Example of network adapter properties
Replace “TP-LINK 802.11ac Network Adapter” in file “windows/build_import_start.cmd” to your adapter name.
...

:: set network adapter you want to use
SET ADAPTER_NAME=TP-LINK 802.11ac Network Adapter

...
Note. You can also update hostname and ip addresses in file “windows/build_import_start.cmd”
Build/Import/Start images
Now, we are ready to build our cluster by running file “windows/build_import_start.cmd”.
If every is fine, you will see something like.
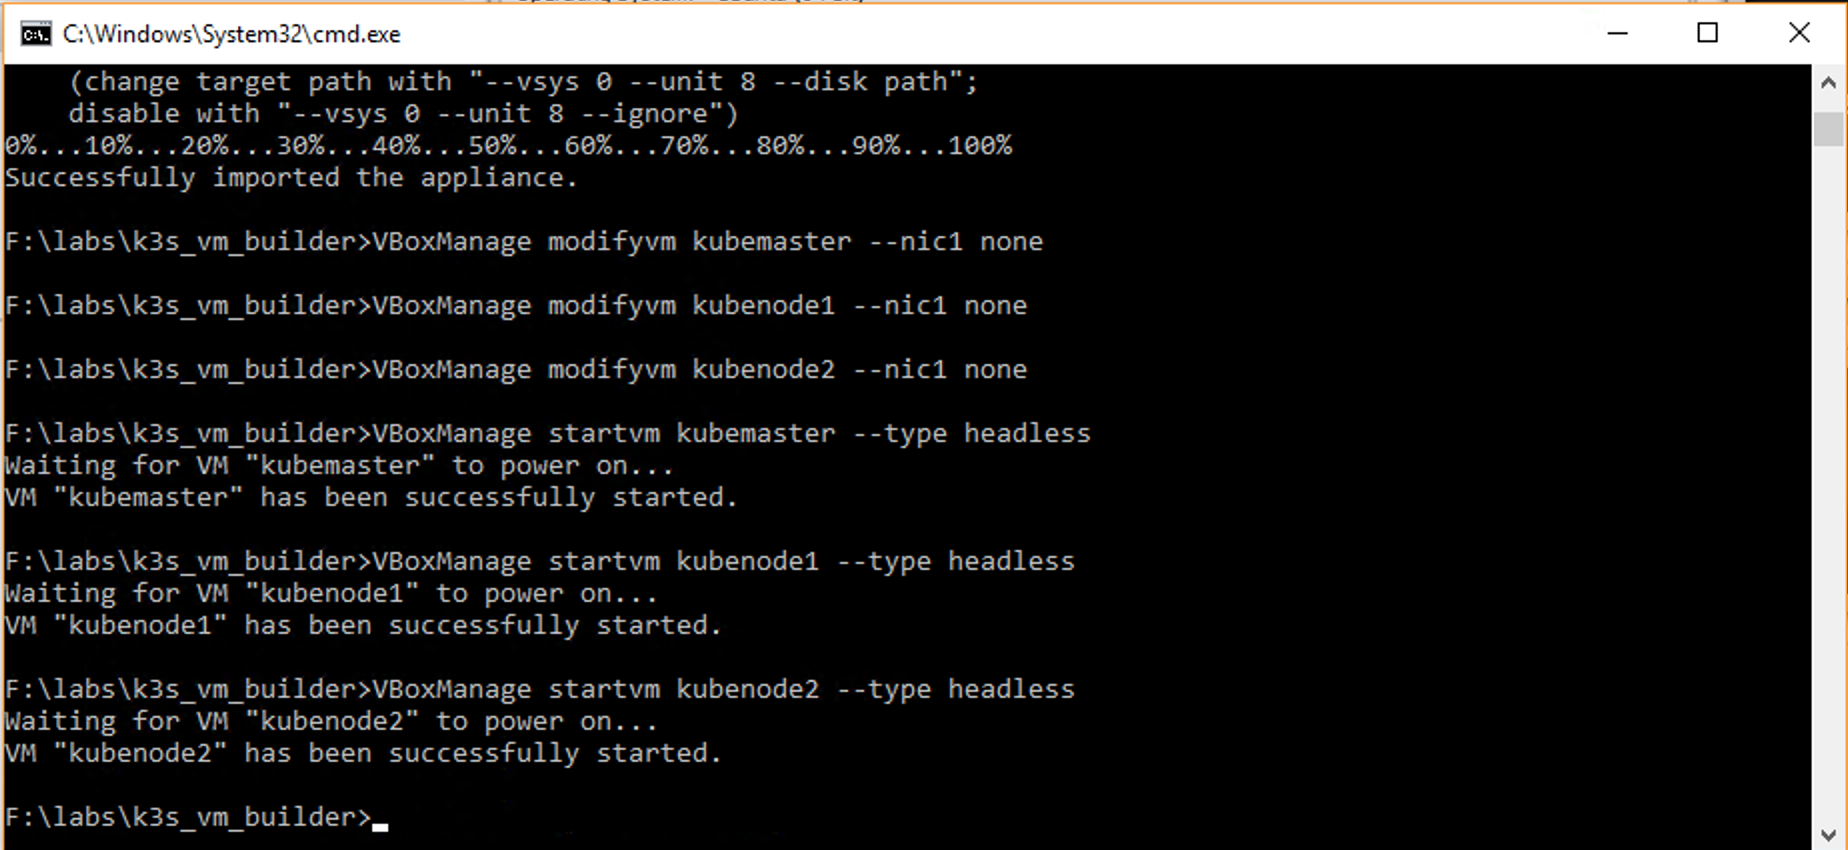 Cmd screen when run successfully
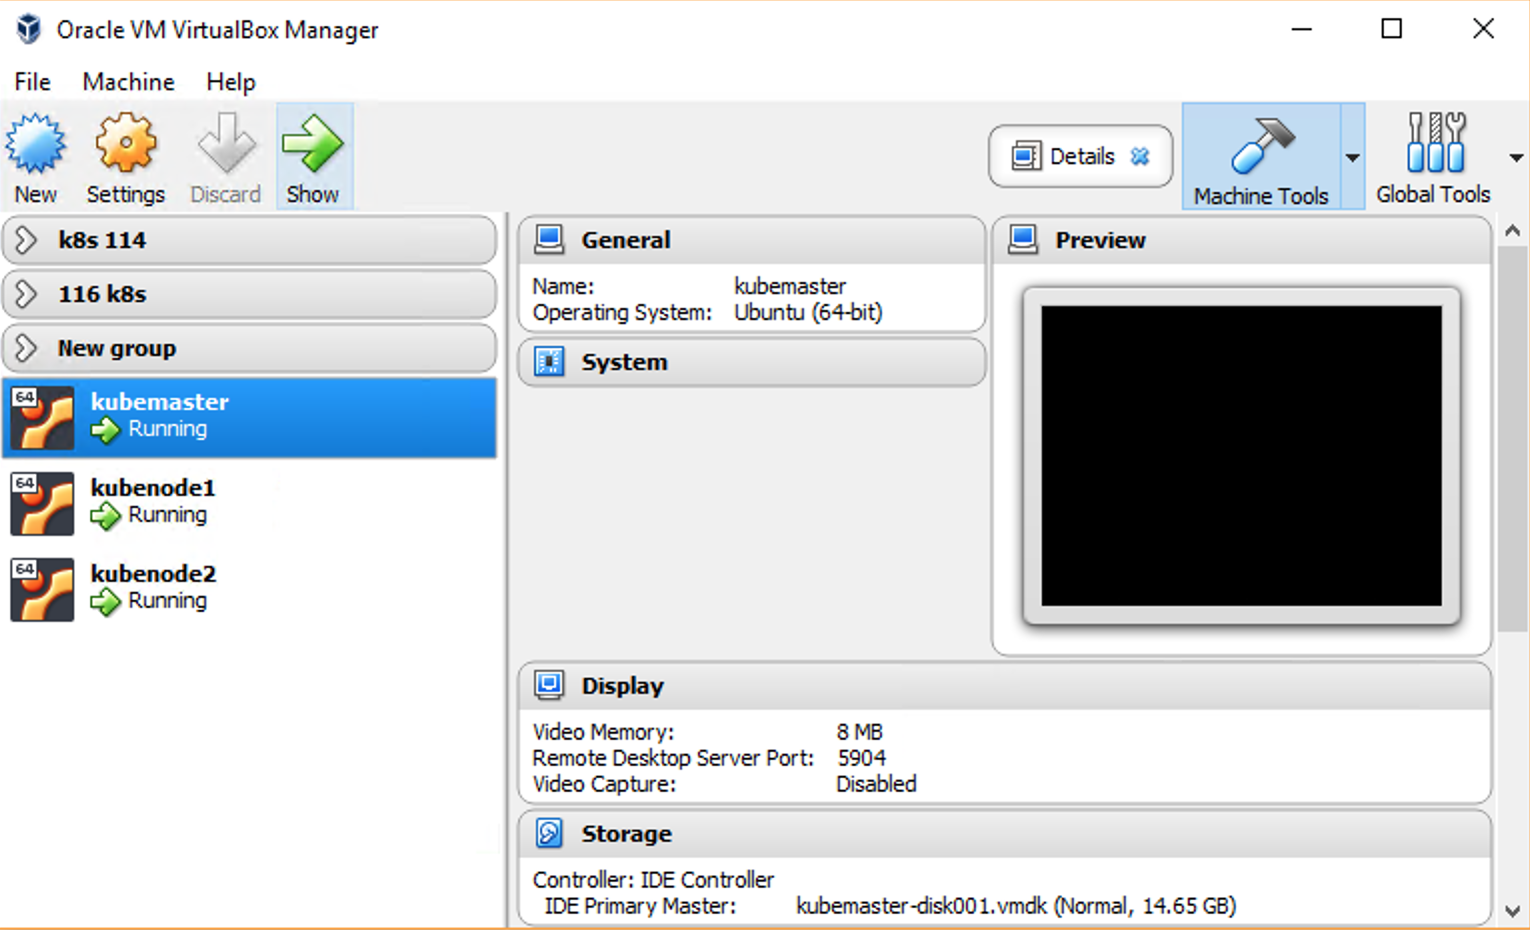 Virtualbox screen when import successfully
Note. These are a 3 steps build.
- Build 3 images with hostname and static ip
- Import these images as Virtualbox machines
- Start all 3 machines
To destroy the cluster, just remove all machines and also their files, then run script again to reimport.
2. Setup K3s cluster
Now, we got 3 empty virtual machines with network configured. They are ready to install a Kubernetes cluster by following these steps.
Setup master node
This step we will ssh to the master node and install K3s master.
To ssh, run
ssh 192.168.1.61 -l packer
# enter password 'packer'
You can also access master node directly from Virtualbox UI.
Install K3s master.
###### on master node
###############################
curl -sfL https://get.k3s.io | INSTALL_K3S_VERSION=v1.20.8+k3s1 K3S_TOKEN=mynodetoken sh -s - --no-deploy traefik

# prepare config file distribution
sudo cp --no-preserve=mode /etc/rancher/k3s/k3s.yaml k3s.yaml
Note.
- You can replace token “mynodetoken” with your own token.
- We will install k3s version “v1.20.8+k3s1”. You can change to any version https://github.com/k3s-io/k3s/tags.
- “–no-deploy traefik” is used to skip K3s default ingress (If you need it, just remove it). In this case, I want to install my own ingress later such as Nginx or Ambassador.
Setup worker nodes
Next, we will ssh to the each worker node and install K3s worker.
To ssh, run
ssh 192.168.1.62 -l packer
# enter password 'packer'
You can also access worker node directly from Virtualbox UI.
Install K3s worker.
###### on worker node
###############################
curl -sfL https://get.k3s.io | INSTALL_K3S_VERSION=v1.20.8+k3s1 K3S_URL=https://192.168.1.61:6443 K3S_TOKEN=mynodetoken sh -
Note.
- replace token “mynodetoken” if you change it when setup master node
- We will install k3s version “v1.20.8+k3s1”. If you change the version above, this needs to be changed accordingly.
Repeat steps above but change the ip from 192.168.1.62 to 192.168.1.63
Setup cluster access (Optional)
We’ve got a working Kubernetes cluster now. To access and use our Kubernetes from any computers outside the cluster, we need to setup client tools.
- kubectl - Kubernetes cli client
- helm - cli to install application to the cluster
Copy cluster config file from master node to local computer.
###### on client (linux or osx)
###############################
# copy kubeconfig from the remote
USER=packer
MASTER_IP=192.168.1.61 # master ip

scp $USER@$MASTER_IP:/home/$USER/k3s.yaml k3s.yaml
# enter password: packer
Move config to the default config folder.
sed -i "" "s/127.0.0.1/$MASTER_IP/g" k3s.yaml
mkdir -p ~/.kube
touch ~/.kube/config
cp ~/.kube/config ~/.kube/config.bak
KUBECONFIG=k3s.yaml:~/.kube/config kubectl config view --flatten > config
mv config ~/.kube/config
rm ~/.kube/config.bak
chmod go-r ~/.kube/config
Note. if you have existing config, this script will merge it for you.
Install kubectl.
# install kubectl (https://kubernetes.io/docs/tasks/tools/)
curl -LO "https://dl.k8s.io/release/$(curl -L -s https://dl.k8s.io/release/stable.txt)/bin/darwin/amd64/kubectl"
chmod +x ./kubectl
sudo mv ./kubectl /usr/local/bin/kubectl
sudo chown root: /usr/local/bin/kubectl
kubectl version --client
Install helm3.
curl https://raw.githubusercontent.com/helm/helm/master/scripts/get-helm-3 | bash
helm version
Verify
Check if our cluster is running.
kubectl get node
Successful looks like this.
➜  ~ kubectl get node

NAME         STATUS   ROLES                  AGE     VERSION
kubenode1    Ready    <none>                 2m37s   v1.20.8+k3s1
kubenode2    Ready    <none>                 2m18s   v1.20.8+k3s1
kubemaster   Ready    control-plane,master   3m7s    v1.20.8+k3s1
Congratulation! You have your own private Kubernetes now.
Conclusion
We build our own light weight but looks like a production Kubernetes cluster. You can add more feature, install applications, and do any Kubernetes experiment you want. if you mess up, don’t worry, just remove them, reimport, and reconfigure. Happy kubing :D.